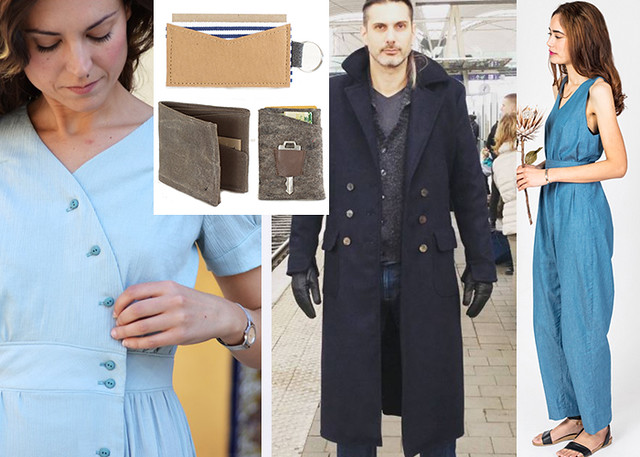
Now that it’s November I’m sharing my recommendations for present making. You can see the full list of pattern suggestions on my vlog, and the full list with links is also copied below.
I’ve included lots of free patterns, plus some paid-for patterns which make ideal gifts. I’ve focused on sewing patterns, but have also recommended a few favourite sources of free knitting patterns.
Now I just need to start making some of these rather than leaving it until the last minute…
I’ve had more time to sew recently as a result of both having a more relaxed job, and Phil starting an online undergraduate degree (in computer science) which is keeping him busy most evenings. Once Phil is settled down to study I’m turning to my sewing projects in the evenings much more often than I have previously, as opposed to watching Father Ted/Red Dwarf/Blackadder on repeat, which is what usually happens when we both have a free evening.
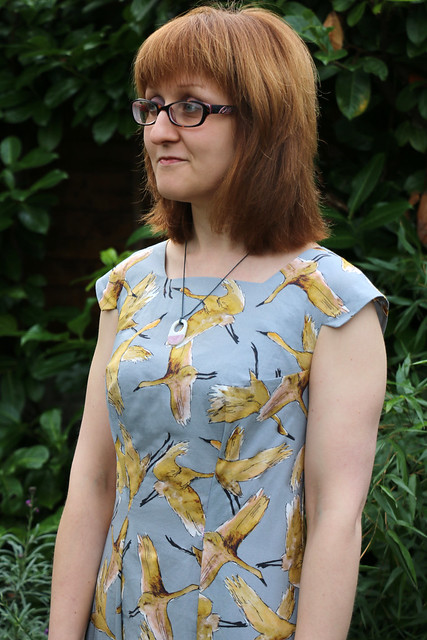
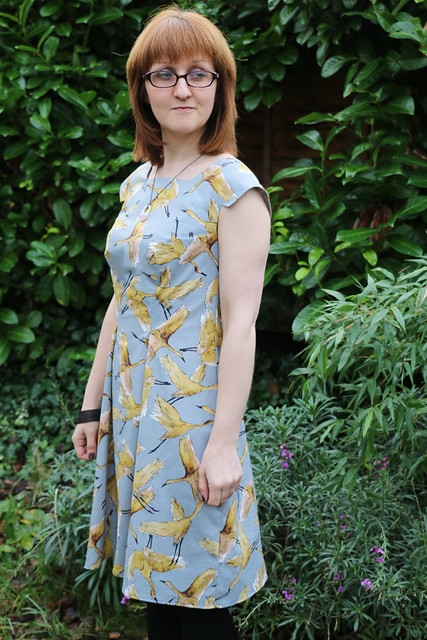
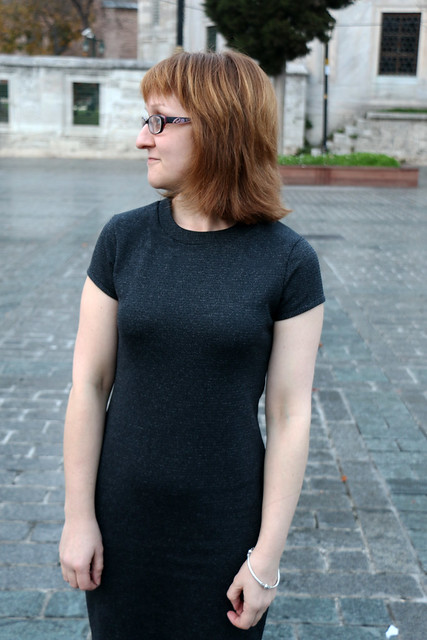
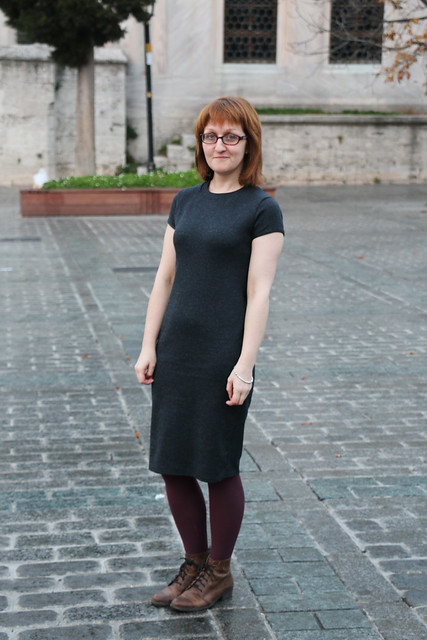
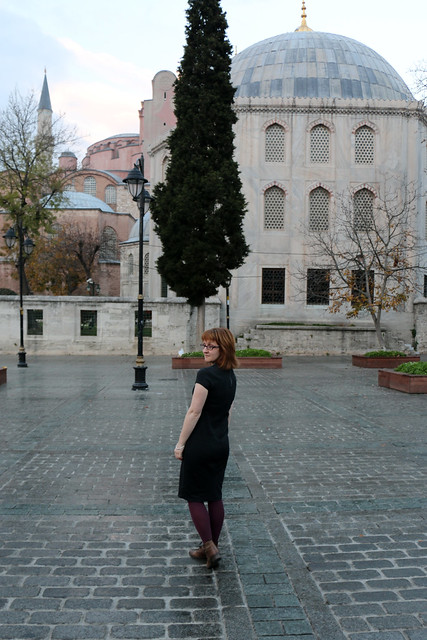
With my additional sewing time, I’ve made some of those new release patterns which take the sewing community by storm and have to be started immediately, and I’ve also made some of those patterns which have been on my to-sew list for years, including the Kielo wrap dress which has been on my list since it was first released back in 2014.
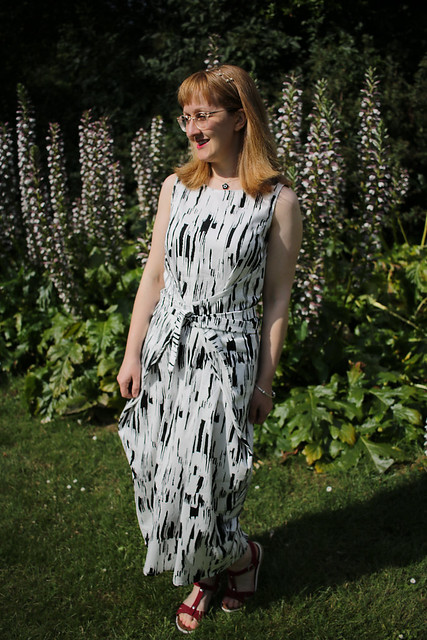
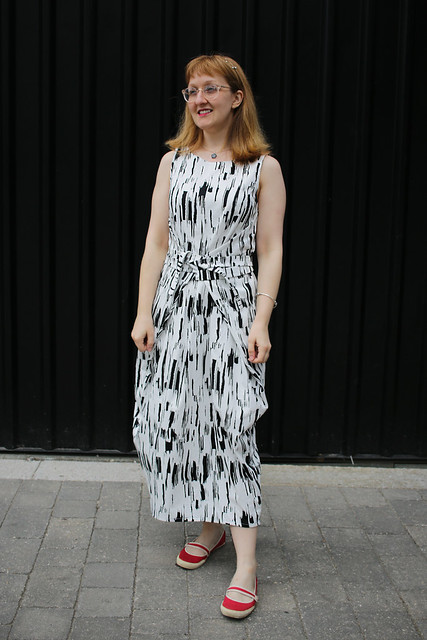
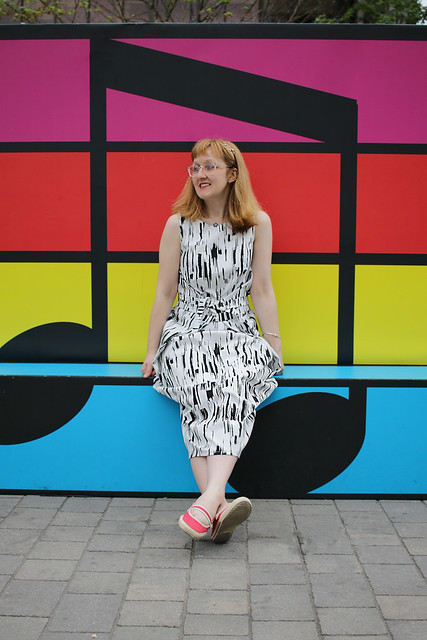
The particular motivation to get on with finally trying out the Kielo pattern was the offer of this cream and black Stretch Cotton Sateen Fabric from Minerva Crafts as part of their Maker Team. I remember the launch of their Blogger Network well so it was fun to contribute my first post, which is now live here. I actually managed to write about the construction of the dress, rather than my normal blog waffling (as evidenced here), so check out the MC blog for actual construction details.
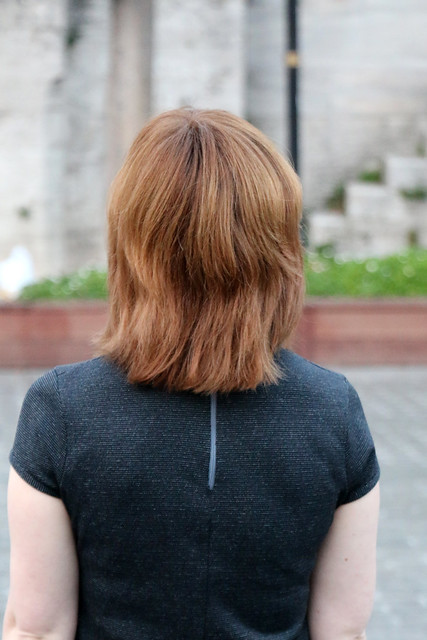
The fabric is a medium weight woven which emphasises the silhouette of the Kielo in a way I really like, although it needs a short jacket in cooler weather as paired with a longer one the silhouette looks a bit frumpy. After waiting 5 years to try the Kielo (and given that it took all of two evenings to sew) I think that another version at least is called for, and I’m keen to try the pattern in a lightweight knit for a different silhouette. I cut a straight size 10, reduced the length (by 9 inches) and consequently increased the height of the vent.
These photos were taken during a recent trip to London after Phil won two free tickets to see The Who at Wembly Stadium! I’m well aware of the many ways I am lucky, but lately I’ve been lucky in the competition-winning sense. Long may it continue!
For the first Dressmakers’ Ball, organised by the team at Crafty Sew & So in Leicester, back in 2017, I left making my dress until the very last minute and ended up sewing a knit dress the night before the ball.
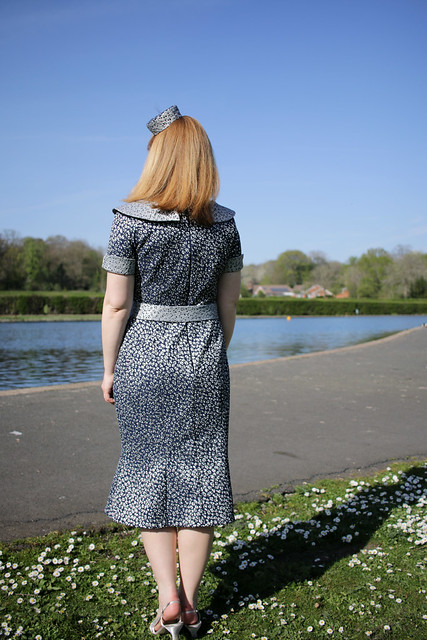
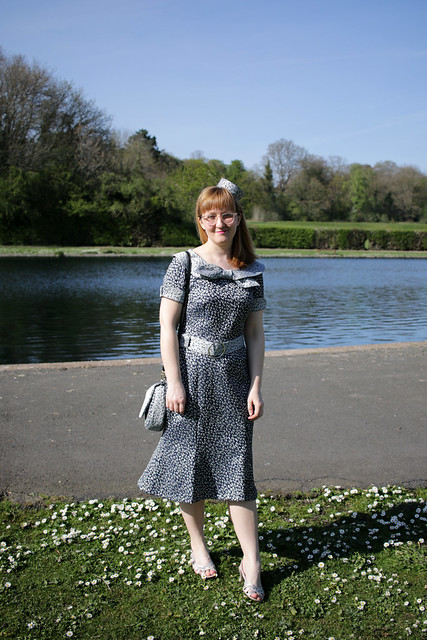
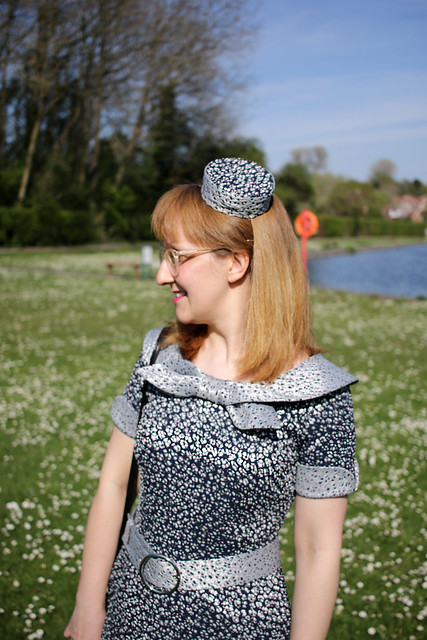
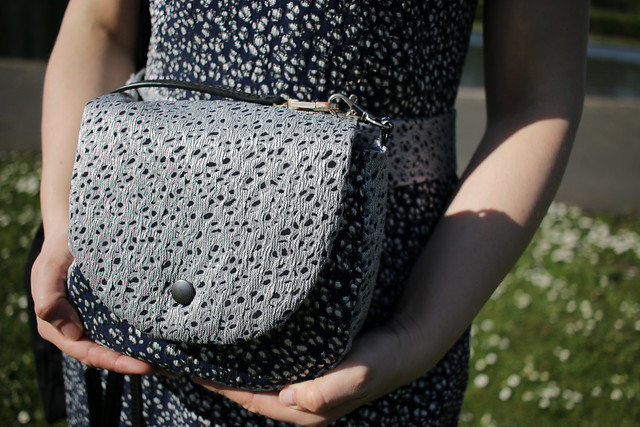
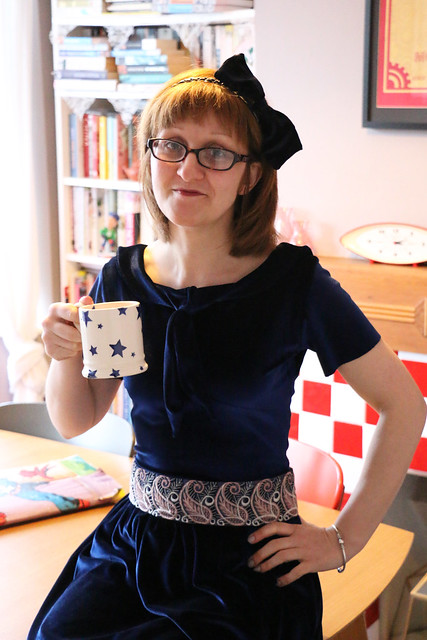
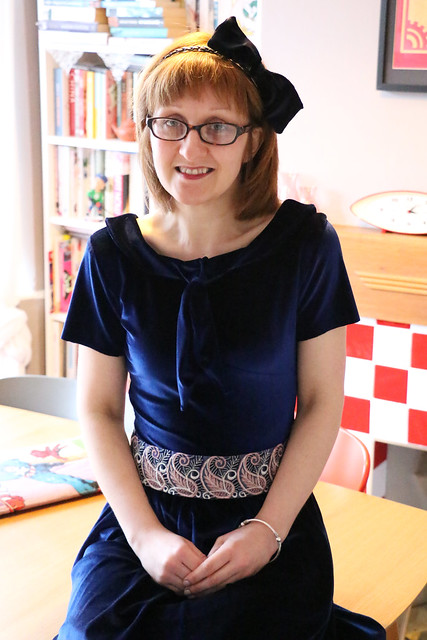
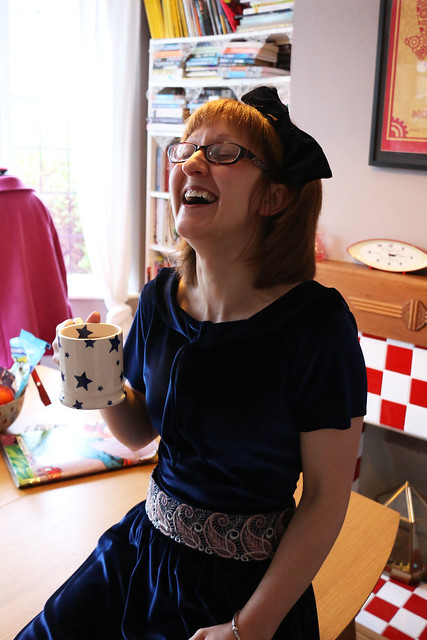
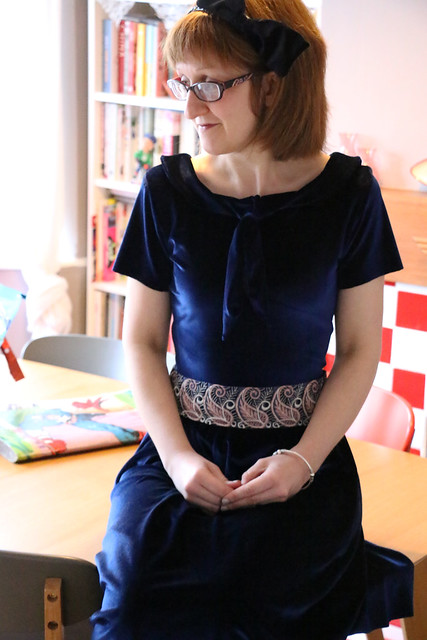
This year I was determined to be organised, and finished my dress with so much time to spare that I ended up making a matching belt, pill box hat, and bag (which collectively won me an award on the night for best accessory!).
The dress is Charm Patterns Night and Day Dress. I have the PDF version of the pattern (a gift from my parents for Christmas) and sent it for A0 printing as the pattern has many variations (including some very full skirts) so is enormous. I printed all of the pages as I’m keen to try some other variations in the near future. The version of the dress I made for the ball was actually decided by my fabric choice.
I was visiting New York – and attending Male Pattern Boldness Day – the month before the Ball, so decided to buy fabric for the dress at the meet-up. I was planning to get something drapey to make the bishop sleeved version of the Night & Day Dress, but once I spotted this double-sided metallic brocade in Metro Textiles I was sold.
Having had pretty consistent body measurements since my twenties, if not before, I’ve increased a few inches in the bust and waist recently. On a few recent projects I’ve cut out on autopilot based on the size I’m used to cutting (and gotten away with it), but for this project I was determined that I wasn’t going to skimp on any steps to a well fitting dress. I measured myself and cut the correct size, only to find, when I tried the work-in-progress bodice on, that it was too large. I took the bodice apart and cut the pieces down a size (to a 4 in the bust and 6 in the waist to hips, the size I would have cut on autopilot) and the fit was just right. I’ve since bought Gertie’s new book, Gertie Sews Jiffy Dresses, which uses the same sizes/block as Charm patterns, and Gertie notes in the introduction that the sizes are generous in the bust and hip.
I should say that I don’t bother with muslins/toiles, so although I always hope patterns will fit first go, I’m always expecting to need to make changes. Personally I prefer to make alterations to a sewing project as I go, in this way, and regularly do. I find that approach works much better for me, and I’m very rarely left with an unsalvagable project.
After making the dress, I felt that the pattern needed breaking up at the waist so I made a matching belt, using the reverse side of the brocade. I couldn’t find any belt buckles for sale locally in Birmingham, and hadn’t left myself long enough to risk ordering one online. I popped into H&M in the hope of finding something suitable and found an ugly fake leather belt on sale for £3. I cut my fabric based on the width of the buckle (not the belt I removed, which was much wider & horribly bunched up), and punched through some Prym eyelets for belt holes.
Next I started on a hat. I have a couple of hat making books I picked up cheaply years ago and hadn’t yet made anything from. This pill box hat was based on a design in Saturday Night Hat. The book instructions are based on using millinery supplies, but I walked to Fancy Silk Store one lunch break and asked for the closest they had to double buckram. The material I bought feels quite plasticky and is impossible to sew through, so it works to provide a firm structure but is more of a faff than an actual double buckram would be (I assume). The base of the hat is a circle (for the top) and a rectangle (for the sides) which I managed to attach together (the material also resisted all attempted to glue it) by punching holes along the edges of the top and sides, and sewing the pieces together through these holes. The hat is then covered in fabric pieces, which are sewn to each other. Finally, I punched Prym eyelets on either side and threaded elastic through. It’s worn behind my ears / under my hair.
The hat pictured here isn’t actually the version worn at the ball. This is a replacement pill box, as the first was ‘stolen’! The day after the ball, Phil and I were having a wander around Leicester. I was carrying the pill box hat in a plastic bag (along with a cheap comb and a sewing kit) to avoid squashing it in our very full suitcase, and accidentally left the bag unattended for ten minutes in McDonalds. We dashed back to find it but it was already gone! This second version is better constructed than the first, so I’m thinking of the lost one as a rare (for me) toile!
Finally, the night before the ball, I decided to whip up a matching bag. This bag was based on a pattern included with a recent issue of Simply Sewing magazine (issue 54). I didn’t have time to create/order a strap, so borrowed one from one of my handbags, and I finished hand-sewing the inside of the bag on the train to the ball (in good company, travelling with the lovely Sue).
The Dressmakers’ Ball was a really fun evening and a great incentive to make a more glamorous dress and a plethora of accessories. I believe Crafty Sew & So are planning to hold the ball every other year, and I’m thinking next time I need to take the word ‘ball’ to heart and create something really dramatic.
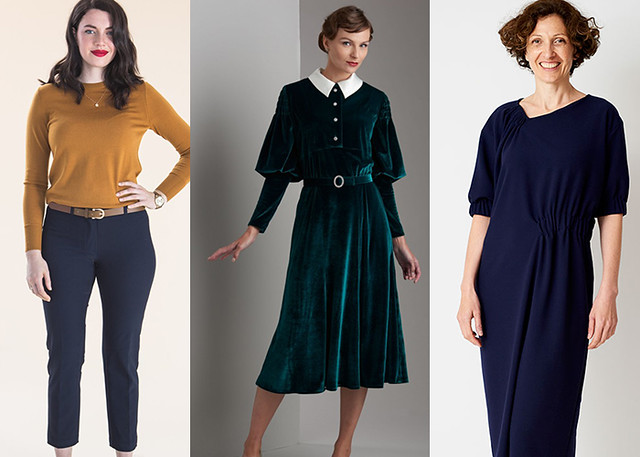
I’ve published a vlog of my personal favourite sewing patterns releases during 2018.
I’ve only sewn one of these so far, but I suspect I’ll get around to a fair few eventually. I have a couple in progress currently, including a Yates Coat.
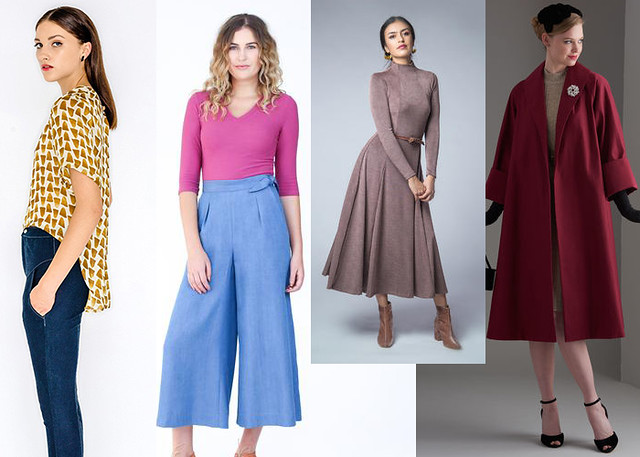
I’ve been sorting my pattern and fabric collections, and making sewing plans for 2018. While sorting patterns, I started thinking about my favourite sewing pattern releases of 2017, and I thought it might be fun to share my personal favourites list.
I’ve only sewn two of these so far, but I suspect I’ll get around to most of them eventually, it might just take me a few years.
Long time no see, guys! I’ve been finding slightly less time to sew and knit lately, but even less to blog. I’m off on holiday to Seoul and Tokyo next week, and have a few recent projects to photograph, so no doubt I’ll have a few garments (and probably some holiday fabric shopping…) to blog in the next few weeks.
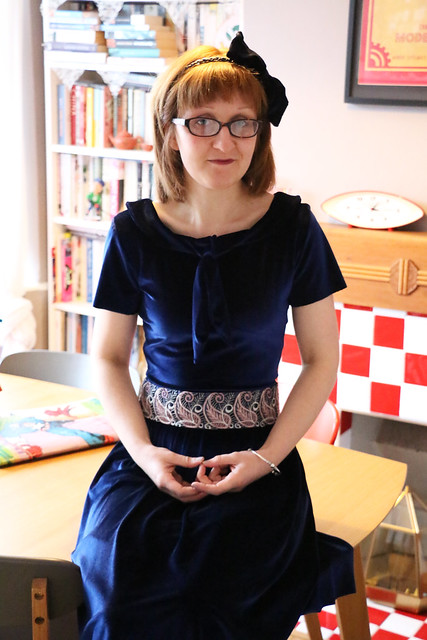
Before that, as I’m sure you’re well aware, back in February Elle, Rachel and Abigail hosted an online Moneta Party. I had sewn Moneta once before, but wanted to make a new version for the party.
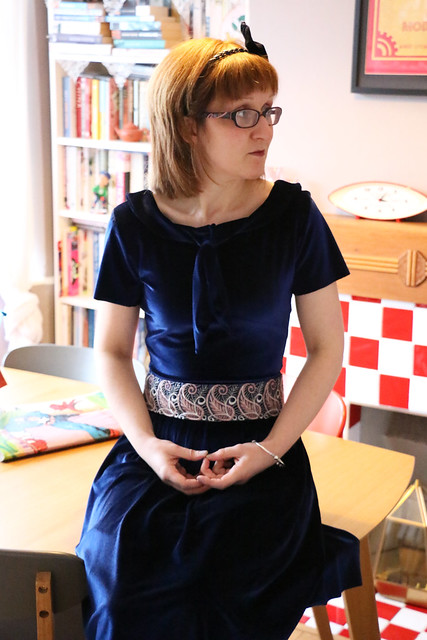
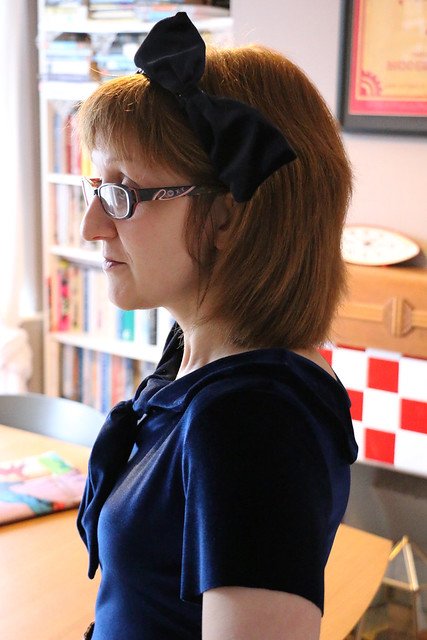
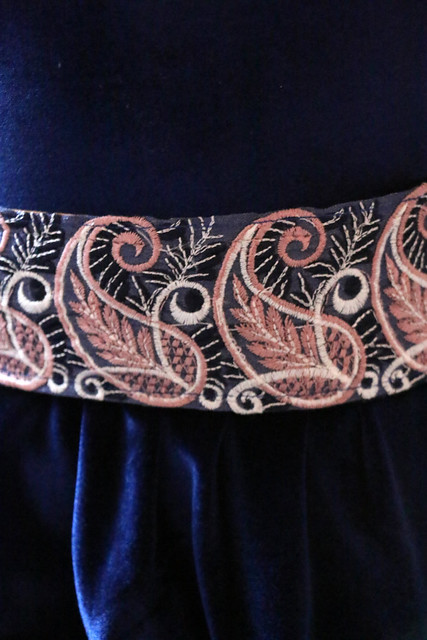
I whipped this version of Moneta up quickly the weekend of the party, in a blue stretch velvet from Barry’s Fabrics. I added the Tie Collar from the free Moneta extras pack, and made a belt to wear over the dress, using a trim purchased from Birmingham Rag Market. To make the belt I just added a stiff backing fabric to the trim, and hook and eyes to fasten it.
The dress looks ok in these photos, but I’m afraid there were actually a few issues with my fabric choice which mean it hasn’t survived! The stretch velvet I chose clung unflatteringly in the bodice, and having constructed the dress I noticed a flaw in the fabric right under the bust… After taking these photos the dress was cast aside for a few days, after which I removed the bodice and fitted a waistband to make a simple gathered skirt.
These photos were taken quickly in our front room, to make the Moneta Party photo deadline. Phil was making fun of my modelling skills, which resulted in the following…
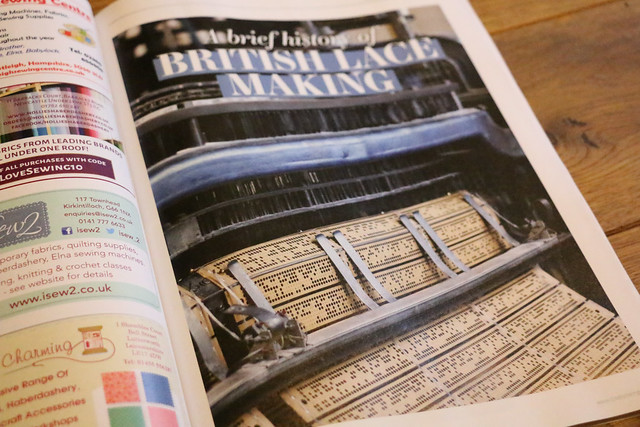
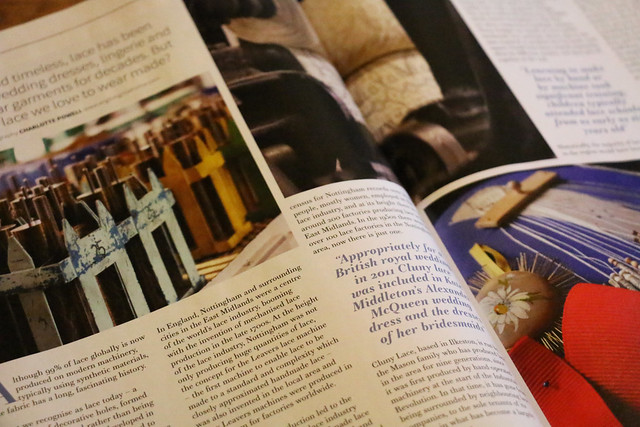
My article for Love Sewing was a brief history of British Lace Making, with a focus on the Nottingham lace industry and Cluny Lace, who I have blogged about previously.
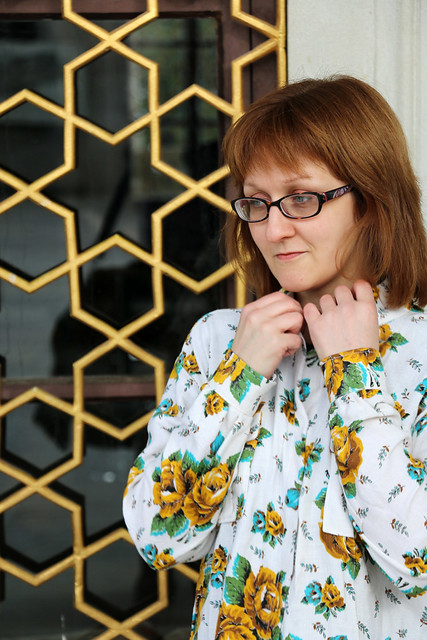
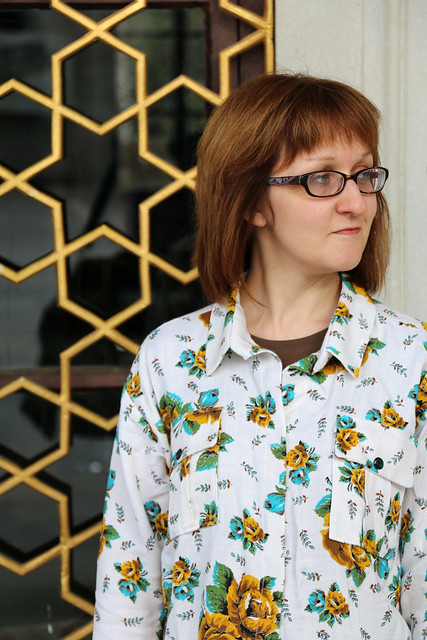
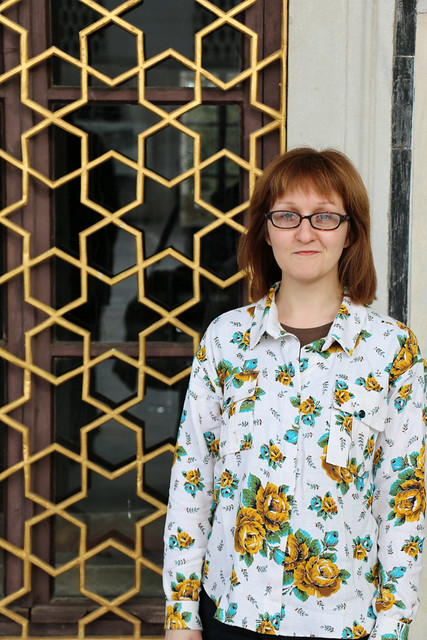
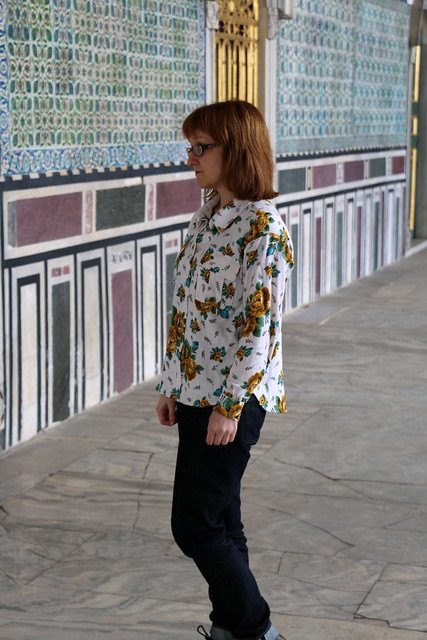
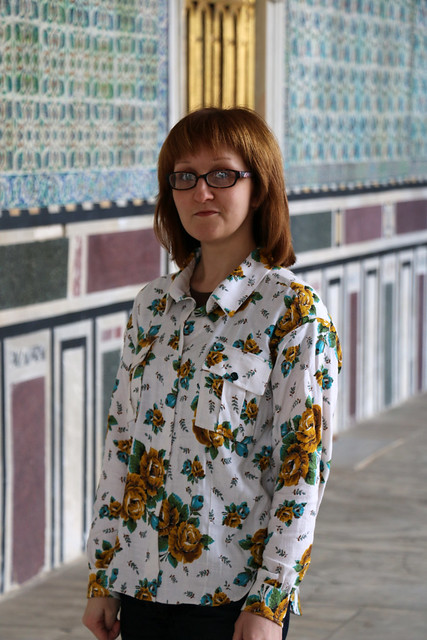
When I tested the Sangria dress from the Winter 2016 pattern collection from Capital Chic Patterns, I also asked Sally if I could test the Cuba Libre shirt. Before I began regularly sewing garments, a good proportion of my wardrobe was made up of RTW shirts, but I haven’t actually sewn many shirts (just one Archer), partly because I already have lots in the wardrobe, and partly because I have a tendency to pick quicker projects. However, I though Cuba Libre would be the perfect opportunity to add some me-made shirts to the wardrobe.
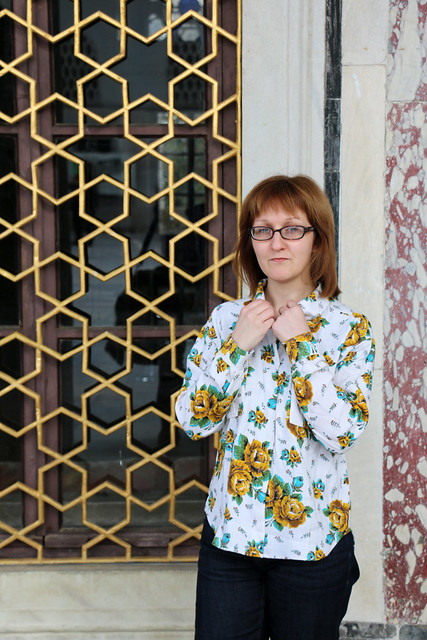
I’m afraid I was a useless pattern tester and didn’t finish this shirt before Sally’s feedback deadline – but she let me off the hook! In fact, I still haven’t quite finished the Cuba Libre shirt shown here. I didn’t manage to add buttonholes or buttons before our holiday to Istanbul, but packed the shirt anyway, and I sewed myself in (plackets & cuffs) so I could wear it for a trip to Topkapi Palace, where these photos were taken. Sewing blogger problems, huh?
I also hand sewed the hem in our hotel room the same morning – which is actually standard for me, as I often hem garments by hand using a slip-stitch. In these photos it looks like the shirt has a hidden button placket – but that’s just because I haven’t attached buttons as yet (I will, I have no intention of regularly sewing myself in)!
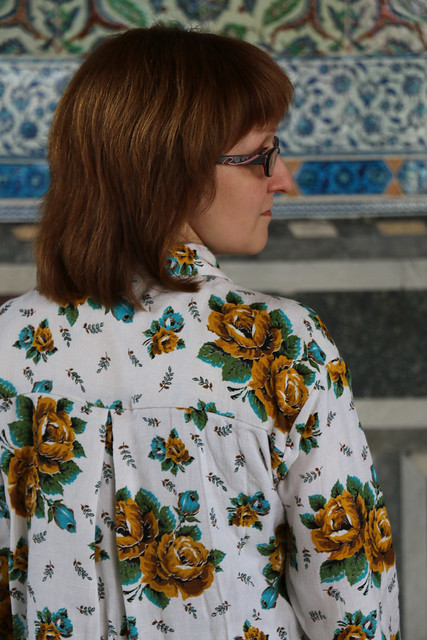
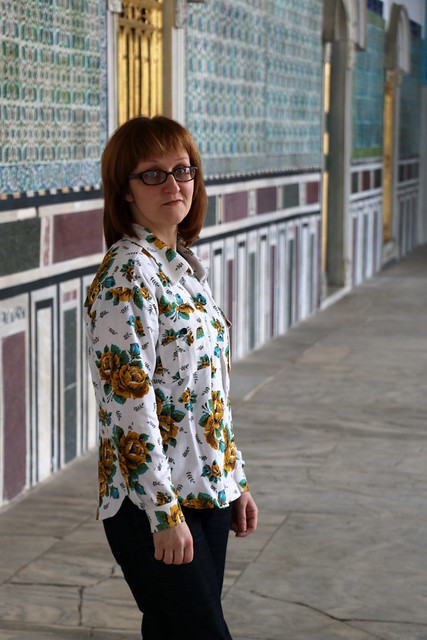
This is a really great pattern with lots of lovely shirt details: yoke, collar with stand, cuffs and cuff plackets, patch pockets with flaps. I was working from the tester version, but Sally’s instructions are great and if even you’re not familiar with shirt making it’s nice and straightforward.
Cuba Libre is intended to be oversized – in a thicker fabric, as here, it results in quite a casual look, but in a more luxurious fabric (as in Sally’s sample photos) it can look very glam.
My fabric was a remnant I picked up from the sale table at a local Embroiderers’ Guild meeting, It’s medium weight but very drapey, and very synthetic. I’ll definitely be making more Cuba Libre shirts – the pattern also includes two lengths of shirt dress, and I love a shirt dress as much as I love a shirt, so will be attempting all variations at some point. Some of the lovely details are a bit lost in this print, so I think I’ll make it in a solid (or, as a lover of print, perhaps a very small scale print…) next time.
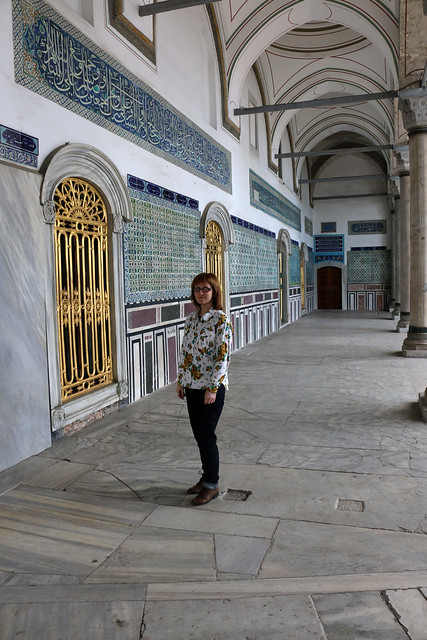
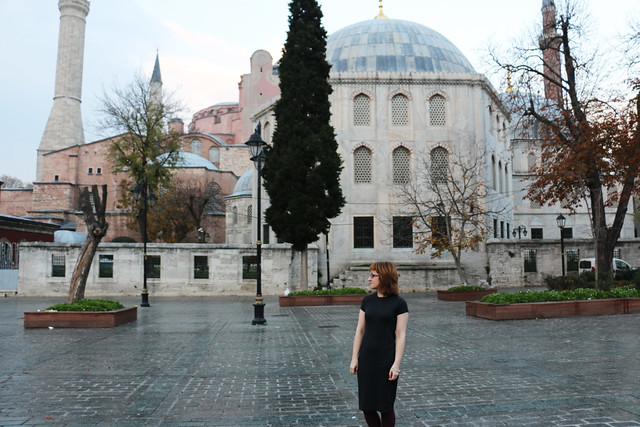
As noted above, these photos were taken in Topkapi Palace during my recent trip to Istanbul. If you’re not familiar, Topkapi Palace was a residence of the Sultans until its conversion into a museum under the Republic. The Palace is absolutely beautiful and definitely worth a visit (although make sure to visit Dolmabahçe also), especially on a sunny day when it’s lovely strolling between buildings. The Palace has a fascinating history which it’s worth reading up on before you visit, time permitting; as is often the case with palaces, it was a beautiful prison for an awful lot of its residents.
A personal favorite fact about Topkapi Palace is that it had a dedicated confectionery kitchen which employed up to one hundred confectioners – proof, if needed, of how seriously Turkish people take their puddings! A Turkish colleague told me previously that I was well suited to working in Turkey, due to having such a sweet tooth. Well, when in Rome.
I’m currently on holiday in Istanbul, hence the backdrop of Hagia Sophia in these photos. Before heading off on holiday, I was thrilled to be involved in testing the new Winter 2016 pattern collection by Sally (of both Capital Chic Patterns and Charity Shop Chic). I love all of the patterns in the collection but, due to lack of time, Sangria – which is my far the quickest sew – was the only pattern I tested.
This is the first version of Sangria I made, using some mystery fabric from Birmingham Rag Market (I think it’s a mid-weight jersey). The pattern is designed for scuba jersey, to achieve a smooth line over the body (i.e. avoid visible panty line). I have tried it in three different fabrics now (pictures to follow), and found it works well in jerseys, as well as scuba jerseys, particularly if they are medium weight. I fancy placing a Girl Charlee order and seeing how it sews up in a selection of their fabrics. As an added bonus, in a stretchy knit you can skip the back zip, making this an even quicker sew.
This version was sewn using the test pattern. I graded between sizes 10 (bust) and 12 (waist/hips), and sewed a narrow seam allowance on the sleeves, which felt a little tight (a reasonably common adjustment for me). As this fabric has quite a bit of stretch, I used a shorter zip than recommended, just to allow me to get the collar over my head. I do get a bit of pooling of fabric at my lower back, which I ought to sort for future versions, and which I only recently noticed, since I don’t see my back that often!
I absolutely love this pattern for work dresses, and have also made a party version in a shiny snakeskin print which I’m hoping to rock this weekend!
Right, I’m off sightseeing. Hope you also have good weeks planned!