english girl at home

A Sewing & Knitting Blog, Made in Birmingham, England


1 Comment

Sewing World Natural Dyeing Article

Sewing World Nation Dyeing Feature

Just a quick post to let you know that, thanks to the lovely Kerry, I’m featured in the September issue of Sewing World magazine (which has been on sale since mid-August, I’m late posting…).

Kerry writes a regular article for the magazine, with the September issue’s on the topic of natural dyeing. I’m featured alongside Folk Fibres and The Modern Natural Dyer.

I haven’t managed to post on the blog about natural dyeing much lately, but have projects to share when I get chance – plus a pile of silver birch branches in the garden, which Phil pruned from our tree, waiting for me to try dyeing with.

Sewing World can also be found on Facebook & Twitter.

Sewing World Nation Dyeing Feature


5 Comments

A Naturally Dyed Wardrobe: Favourite Online Resources

Natural Dye Seeds

My dye plant seeds are sprouting!

As part of my #naturallydyedwardrobe project, I wanted to share some favourite online resources about natural dyeing:

Folk Fibers – I love both the beautiful naturally dyed products, and the blog posts about natural dyeing (use the search bar and keywords ‘natural dye’ to locate them). In particular, see the blog posts about dyeing with pomegranates, osage orange, red onion, yellow onion, and mushrooms.

The Botanical Colors website contains lots of information on natural dyes and how to use them, via the instructions section and blog. The shop (US-based) contains a wide range of natural dyeing supplies and workshops.

A Verb for Keeping Warm – The blog contains a huge amount of information on natural dyeing, including the work-along for the Modern Natural Dyer book.

Jenny Dean has written a number of excellent books on natural dyeing, and her blog also contains lots of detailed information about natural dyeing.

Various Woolful podcasts (and associated blog posts) focus on natural dyers.

A number of One Year One Outfit participants have been doing some really interesting natural dyeing with a focus on local plants, including: Nicki, Sue, Carolyn, and Mari.

Kelly Ruth creates a beautiful naturally dyed clothing line, available from her Etsy store.

The Wild Colours (UK-based) online shop is a good source of natural dye materials, and also contains lots of information about dyeing. A sister site, dedicated to Woad, also contains lots of background information.

I love the Seasonal Color Wheel, which depicts the dye colours produced from seasonal foods. I might attempt a sewing project inspired by it…

I’ll be back with my favorite books about natural dyeing soon.


6 Comments

A Naturally Dyed Wardrobe Update

Woad Seeds
Woad Seeds

I’ve written a short post for The Fold Line blog today on natural dyeing.

It reminded me that I haven’t blogged about my #naturallydyedwardrobe project lately. I have done less natural dyeing recently, it’s not as tempting in the winter – even though there are still plenty of available plant materials. However, I have dyed fabrics with indigo and madder powder, and with onion skins – blog posts to follow.

At the start of 2015, I set myself a list of natural dyes I wanted to try. I didn’t find time to try all of them, but looking back I actually blogged about quite a few natural dyes last year:

Turmeric
Paprika
Biden
Indigo
Solar dyeing with fungi and biden
Madder
Marigold
Indigo and logwood
Plus, with my guild I took part in a dyeing day, and a natural dyes exhibition.

Dyers Chamomile Seeds

I’m planning to continue my #naturallydyedwardrobe project during 2016. As previously, I’d like to include dyes from plants I’ve grown, materials I’ve foraged, and from store cupboard items or dye extracts which I’ve purchased.

To get started, I planted four types of dye plant seeds during May:
♥ Woad
♥ Dyers Chamomile
♥ Dyers Coreopsis
♥ Weld

Dyers Coreopsis Seeds

I purchased the seeds from Wild Colours, and followed the planting instructions on their website. The seeds are currently in trays inside a growhouse, so hopefully they will be sufficiently sheltered from the intermittent cold weather we are currently experiencing in the UK.

I’m aiming to blog about my #naturallydyedwardrobe project more regularly over the course of the year, including recommendations for books, online resources and tools, and about how these little seeds progress (if at all – last year my woad plants failed to materialise).

Weld Seeds
Weld Seeds

Natural Dye Seeds


8 Comments

A Year in Colour Exhibition

A Year of Colour Exhibition by Birmingham Guild of Weavers, Spinners & Dyers

During 2015, my Guild ran a year-long natural dyeing project with Winterbourne House, a local museum.

Each month, the gardeners at Winterbourne provided plant material (flower heads, bark, leaves, etc.) which the guild tested for their natural dye properties.

To explore the varied colours that can be achieved through the use of mordants and modifiers, eights small skeins of wool were treated with each dye (the first seven of which were pre-mordanted with alum):

  1. basic colour;
  2. light fastness test (kept by a window after dyeing);
  3. acid modifier (vinegar);
  4. alkaline modifier (diluted washing soda);
  5. iron modifier (created by soaking rusty nails in water & distilled vinegar);
  6. Over-dyed with madder;
  7. Over-dyed with woad;
  8. copper mordant (in place of alum).

A Year of Colour Exhibition by Birmingham Guild of Weavers, Spinners & Dyers

A Year of Colour Exhibition by Birmingham Guild of Weavers, Spinners & Dyers

The results of the project are on display in the Coach House Gallery at Winterbourne until 25th April.

Alongside skeins showcasing the colours achieved from each plant material, the exhibition contains a selection of projects created by talented members of my Guild. These projects showcase weaving, spinning, dyeing, knitting and felting – and the wool and silk used in the projects was also largely dyed with plants from Winterbourne garden.

A Year of Colour Exhibition by Birmingham Guild of Weavers, Spinners & Dyers

A Year of Colour Exhibition by Birmingham Guild of Weavers, Spinners & Dyers

I took part in a couple of the monthly dyeing sessions during 2015, and made a small contribution to the exhibition – a handful of knitted chamomile flowers included in the display below.

Winterbourne houses the national collection of anthemis (a genus which includes dyers chamomile). Yarn dyed with chamomile from the garden was used by Guild members to knit and crochet the flower heads below. The knitting and crochet patterns used were also designed by Guild members.

A Year of Colour Exhibition by Birmingham Guild of Weavers, Spinners & Dyers

A Year of Colour Exhibition by Birmingham Guild of Weavers, Spinners & Dyers

The exhibition is only small, but well worth a look if you’re local, and could be followed up with a visit to Winterbourne or to the neighboring Barber Institute of Fine Arts, which is a favourite of mine.

Carolyn, who led the project, blogged the results achieved each month on a dedicated blog.

A Year of Colour Exhibition by Birmingham Guild of Weavers, Spinners & Dyers

A Year of Colour Exhibition by Birmingham Guild of Weavers, Spinners & Dyers

P.S. If you live in the UK and are interested in trying weaving, spinning or dyeing, you can check if there’s a guild local to you using this online search.

A Year of Colour Exhibition by Birmingham Guild of Weavers, Spinners & Dyers

A Year of Colour Exhibition by Birmingham Guild of Weavers, Spinners & Dyers

A Year of Colour Exhibition by Birmingham Guild of Weavers, Spinners & Dyers

A Year of Colour Exhibition by Birmingham Guild of Weavers, Spinners & Dyers

A Year of Colour Exhibition by Birmingham Guild of Weavers, Spinners & Dyers


7 Comments

Indigo & Logwood Dyed Silk Dress & One Year One Outfit Thoughts

Naturally Dyed Silk Dress for #1year1outfit

I realised that I hadn’t written a wrap-up post about my experience of participating in #1year1outfit during 2015. It’s partly because using British fibres has seeped into my making (particularly my knitting) to such an extent that it doesn’t feel like there is an end point. However, I thought I should acknowledge the impact that Nicki’s project has had on my making and also highlight that One Year One Outfit is taking place again in 2016 if you’d like to participate.

Naturally Dyed Silk Dress for #1year1outfit

At the start of 2015 I was just beginning to explore British wools in my knitting and the use of natural dyes (as part of my own #naturallydyedwardrobe project), so One Year One Outfit tied in perfectly with my own growing interest in local fibres and materials. However, without One Year One Outfit I never would have fallen quite so fast and far down the rabbit hole.

Naturally Dyed Silk Dress for #1year1outfit

The project led me to really question and explore exactly what fabrics and fibres are produced in Britain; the results of that search – so far – are compiled here, and I’m continuing to add more resources as I discover them. Exploring currently available British textiles also led me to give greater consideration to the historic textile industry, both to celebrate the beautiful things produced and the skill required to produce them, but also to be aware of the conditions many of these textiles were produced under. In Britain that included child labour, serious health risks for workers, long hours for low pay, and exploitation of the Empire.

Naturally Dyed Silk Dress for #1year1outfit

As a result of participating in the project I’ve produced a number of knitted and sewn garments and accessories (you can see them all here), and it also inspired two articles I wrote for Seamwork magazine profiling British companies: TOFT and Cluny Lace. Most recently I visited the wonderful Ernest Wright & Son in Sheffield (I’m holding their pink 8″ scissors in some of these photos), who I’ll be blogging about soon.

Naturally Dyed Silk Dress for #1year1outfit

Not all of the garments I made as part of the project were 100% British (for example I used commercial thread), but the important thing to me is that it made me consciously think through what I was using and where it was produced; something I want to be increasingly true of all of my making.

Naturally Dyed Silk Dress for #1year1outfit

The dress is these photos is my latest One Year One Outfit make. It is made with British organic silk from Majestic Textiles. I dyed the top portion of the dress with logwood chips, which were gifted to me by a member of my Weavers, Spinners and Dyers’ Guild. The bottom portion of the dress is dyed with indigo from Fabric Treasury. The pattern is my own Lou Lou Dress, view C. I was rather lax cutting this slippery silk so the lines of the dress are a little wibbly, but I love it all the same.

Naturally Dyed Silk Dress for #1year1outfit

Naturally Dyed Silk Dress for #1year1outfit

For anyone interested in exploring British fibres in their own making there is a huge variety of wool (and sheep, mills, dyers, farmers & designers) to explore. Regardless of your chosen craft (knitter, sewer, embroiderer, weaver, etc.) there are British wool products to try. But British fibres don’t stop with wool, I’ve also had the opportunity to work with British silk, lace, linen, and haberdashery supplies, including scissors, needles, pincushions, and buttons. I’m looking forward to seeing what else I can find in 2016.

Naturally Dyed Silk Dress for #1year1outfit

My list of British fibre, fabric & haberdashery suppliers is available here.

All of my #1year1outfit posts are available here.

In these photos I’m wearing the following items which meet my #1year1outfit pledge:

Dress: Lou Lou Dress in Organic British Silk naturally dyed with indigo and logwood
CardiganHancock in Blacker Yarns Lyonesse, in Rose Quartz
Socks: TOFT Bed Socks in TOFT DK, in Oatmeal (naturally dyed with turmeric)
ScarfPianissimo in John Arbon Textiles’ Viola Yarn, in Fern
Scissors: Ernest Wright & Son 8″ Scissors in pink
Brooch: Frilly Industries Spool of Thread Brooch

Naturally Dyed Silk Dress for #1year1outfit


5 Comments

Not So Successful Marigold Dyeing

Natural Dyeing with Marigolds

As mentioned back in March, marigold was one of the plants I decided to grow from seed last year to use for natural dyeing. However, I bought quite a few of my dye plant seeds from the local garden centre, as opposed to a shop specialising in seeds for dye plants such as Wild Colours. As a result the marigold seeds I brought were a French variety (pictured above in the garden), although I didn’t realise that was a problem at the time (or, to be honest, even notice until I went back to check recently)…

Natural Dyeing with Marigolds

In order to build up a sufficient stock of flower heads, I cut them as they flowered and stored them in the freezer. My mom also donated some flower heads from her garden to help increase my supply.

Natural Dyeing with Marigolds

I used an approximately 1:1 ratio (equal weight) of flower heads to fabric. I heated the flower heads in a pan of water, raising the temperature to 70-80ºC, and then adding pre-wetted fabrics and retaining the temperature for one hour. I left the fabric to soak in the pan for an hour before rinsing; finally I gave the fabric a proper wash. Before dyeing, my fabric had been pre-mordanted using the methods previously described in this post.

Natural Dyeing with Marigolds

So, I was expecting shades of yellow and brown. I achieved no colour whatsoever on a selection of cotton fabrics, but the marigold dyed the silk swatches below a range of pale purples! Not what I was expecting at all. (All of the silk swatches are from Minerva Crafts and I have some more successful results to show with their natural fibre fabrics soon).

Silk Naturally Dyed with Marigold Flowers

I do like the resulting colours, even though they were unexpected and I wouldn’t try to repeat them.

Silk Naturally Dyed with Marigold Flowers

This year I’ve bought seeds specifically for dye plants from Wild Colours – I’ve purchased Dyers Coreopsis, Woad, Weld, and Dyers Chamomile. Although natural dyeing always has an element of unpredictability I’m unlikely to get such unexpected results with those seeds.

Silk Naturally Dyed with Marigold Flowers

Silk Naturally Dyed with Marigold Flowers


11 Comments

British Cluny Lace & Silk Savannah Camisole

British Cluny Lace & Silk Savannah Camisole

My second article for Seamwork magazine was published in their December issue.

The article is a profile of Cluny Lace, the only remaining company in the UK making leaver’s lace using traditional leavers and jacquard machinery, which was also designed and built in Nottingham.

Cluny Lace is a family-run business, and has been in the family for 9 generations. Cluny are based in Ilkeston, near Nottingham where lace-making was historically the dominant industry, employing a third of the city’s working population.

Lace produced by Cluny Lace is frequently used by couture and pret-a-porter design houses, and the company regularly post examples to their Facebook page.

You can read my full Seamwork article here, or download the magazine from the Seamwork website.

I was very lucky to be provided with some pieces of lace by Cluny following my visit.

British Made Lace by Cluny Lace, Ilkeston

British Made Lace by Cluny Lace, Ilkeston

I finally bit the bullet and cut into the lace, plus some organic British silk from Majestic Textiles, to make the Savannah Camisole from Seamwork.

Madder Dyeing

Prior to constructing the camisole I dyed both the (cotton) lace and silk using madder. Before dyeing, both textiles had been pre-mordanted using the methods previously described in this post, although mordanting isn’t strictly necessary with madder. I used a madder extract purchased from Wild Colours, and also followed their instructions for using the extract (one of a number of natural dye recipes on their website). Madder extract is very easy to use; following the Wild Colours guide I simply made a paste with 10g of powdered madder and added this to a pan of water on the hob. After adding my pre-wetted textiles I raised the temperature to 60° C and kept it there for 60 minutes. I left the textiles in the pan overnight, before rinsing and then washing them in the washing machine on a low heat.

Madder Dyeing

I decided to make the Savannah camisole mainly based on Sarai’s gorgeous version and because the pattern features lace.

British Cluny Lace & Silk Savannah Camisole

I made up a test version in cotton before cutting into my silk and got a good fit by grading between a 0 at the bust and 2 at the waist and hips. However, I think I stretched out the neckline through handling this silk version as it ended up too wide; I addressed the issue by gathering the neckline to achieve the required width.

British Cluny Lace & Silk Savannah Camisole

I sewed the sides of the cami on my machine using french-seams, but sewed everything else by hand. The only changes I made to the pattern were cutting the shoulder straps to the required length (as opposed to creating adjustable straps using bra rings and sliders) and slightly altering the application of the lace due to the width of the lace I used.
British Cluny Lace & Silk Savannah Camisole

British Cluny Lace & Silk Savannah Camisole

The cami is one of my #1year1outfit projects. It’s not strictly 100% British, but I’d say it is close enough;) The lace is made with Egyptian cotton and is finished (washed / dyed) in France, but is woven in the UK. I also used standard Gutterman thread to make it – I do have some Irish linen thread, but I didn’t have any in an appropriate colour. The silk is from Majestic Textiles, a silk farm in Hertfordshire. I ordered the silk direct but they mainly sell by the bolt so a shorter length incurs a cutting charge, as well as a standard UP postage charge of £11. With those costs added on the silk worked out at £17.50 per metre. Botanical Inks stock a couple of styles of silk produced by Majestic Textiles and allow online ordering.

The silk handles well during sewing and doesn’t mind being washed in the machine, but you can see it seriously holds a crease.

British Cluny Lace & Silk Savannah Camisole

British Cluny Lace & Silk Savannah Camisole

Cluny Lace mainly sell direct to design houses, but you can purchase small quantities of their lace via a number of UK stockists, who mainly stock lace trims. Magic Round About Vintage clearly state which of their lace trims and fabrics are produced by Cluny in the UK. Little Trimmings and The Ribbon Girl are also stockists, but their website are less clear which laces are made in the UK. You can also buy direct from Blue Riband in Kent or Kleins in London.

A few photos of the Cluny Lace factory which weren’t included in the Seamwork article are below.

P.S. let me know if you have some suggestions for great patterns for the rest of my Cluny Lace. I’m thinking the wider lace would look great on the Papercut Clover dress bust panel.

Cluny Lace, Ilkeston

Cluny Lace, Ilkeston

Cluny Lace, Ilkeston

Cluny Lace, Ilkeston

Cluny Lace, Ilkeston

Cluny Lace, Ilkeston

Cluny Lace, Ilkeston

Cluny Lace, Ilkeston


15 Comments

Solar Dyeing with Fungi & Biden

Natural Dyeing with Toadstools

When I started experimenting with natural dyeing, I initially assumed that I wouldn’t have much luck in the UK with solar dyeing, particularly in the winter, due to the fact there isn’t all that much sun.

Natural Dyeing with Toadstools

However, I decided to give it a try with some fungi that sprout in our lawn every Autumn. These are fly agaric, a common British/European mushroom, which is mildly toxic and was used in the past for medicinal and religious hallucinogenic purposes. I really like seeing them pop up in our garden as they are so vibrant, but they don’t last for long as slugs love to eat them.

Natural Dyeing with Toadstools

Here’s one that the slugs had already made a good start on!

Natural Dyeing with Toadstools

Due to the toxicity of the fungi I didn’t fancy boiling them for dyeing and releasing any fumes, so attempted solar dyeing. I started the fungi off with some tap water in two jam jars, since these were the only containers I had lying around at home, and I thought if I delayed the slugs would have eaten every last bit. You can see that these jars wouldn’t be any use for dyeing though, since there is no room for any fibre.

Natural Dyeing with Toadstools

Natural Dyeing with Toadstools

I shortly moved the fungi into a large cheap glass jar, purchased from Tiger, and topped it up with additional tap water.

Solar Natural Dyeing with Fly Agaric Fungi

Since I previously harvested my biden plants and completed one batch of biden dyeing, quite a large number of flowers had bloomed. So I decided to pop some Biden flowers in a second jar for solar dyeing.

Solar Natural Dyeing with Biden Flowers

Solar Natural Dyeing with Biden Flowers

For the best chance of sunlight, I placed the jars on top of our shed (helpfully there is a small shelf over the door which was perfect). I left them alone for a couple of weeks, by which time both jars had achieved a decent colour.

Solar Natural Dyeing with Fly Agaric Fungi and Biden Flowers

At this point I added a small section of pre-mordanted yarn (Rowan Big Wool, a 100% merino wool) and pre-mordanted unbleached cotton into each jar. I could have removed the biden flowers at this point (to prevent them getting tangled in the yarn) but didn’t bother. I did remove most of the fungi as it was already starting to look a little moldy.

Solar Natural Dyeing with Fly Agaric Fungi and Biden Flowers

I read somewhere that a layer of wax on top of the jars can help to avoid mold. I attempted to create this by melting some wax on the surface of each jar. However, I wouldn’t recommend this approach. The liquid was still able to seep through gaps in the wax, and when I came to empty the jars removing the wax was a total pain.

Solar Natural Dyeing with Fly Agaric Fungi and Biden Flowers

Solar Natural Dyeing with Fly Agaric Fungi and Biden Flowers

Solar Dyeing with Biden

I left the fibre in the jars for another week or two before emptying out the contents. The pictures below show the fibre on immediate removal from the jars, and then hung on the line after a wash.

Solar Dyeing with Biden

Solar Dyeing with Toadstool

You can see that I achieved a reasonable pink on the yarn with the fungi, but it had almost no effect on the cotton. The biden, on the other hand, achieved a strong colour on the yarn and cotton. The patchy effect on the cotton is due to how I squashed the fabric into the jar.

Solar Dyeing with Toadstool and Biden

Solar Dyeing with Toadstool and Biden

I have some natural dyeing planned for today – with some precious British silk – so wish me good results.

P.S. There is a beautiful post on dyeing with mushooms on the Folk Fibres blog.


4 Comments

Birmingham Guild of Weavers, Spinners & Dyers Open Day

Birmingham Guild of Weavers, Spinners & Dyers Open Day 2015

Last Saturday was the annual Open Day of the Birmingham Guild of Weavers, Spinners & Dyers, where I am a member.

The open day includes an exhibition of items produced by Guild members which have been woven, spun or dyed. The Guild are a very talented group and I snapped a few photos of some of the items on display, in between helping out.

Dyeing

Birmingham Guild of Weavers, Spinners & Dyers Open Day 2015

Birmingham Guild of Weavers, Spinners & Dyers Open Day 2015

Birmingham Guild of Weavers, Spinners & Dyers Open Day 2015

Weaving

Birmingham Guild of Weavers, Spinners & Dyers Open Day 2015

Birmingham Guild of Weavers, Spinners & Dyers Open Day 2015

Birmingham Guild of Weavers, Spinners & Dyers Open Day 2015

Birmingham Guild of Weavers, Spinners & Dyers Open Day 2015

Birmingham Guild of Weavers, Spinners & Dyers Open Day 2015

Birmingham Guild of Weavers, Spinners & Dyers Open Day 2015

Birmingham Guild of Weavers, Spinners & Dyers Open Day 2015

Birmingham Guild of Weavers, Spinners & Dyers Open Day 2015

Spinning

Birmingham Guild of Weavers, Spinners & Dyers Open Day 2015

The open day also included a teacosy contest for guild members, with tea cosies needing to contain a woven, dyed or spun element. The first and second place winners are in the top two photos below. I didn’t enter anything this year, so will have to make up for it in next year’s competition.

Birmingham Guild of Weavers, Spinners & Dyers Open Day 2015

Birmingham Guild of Weavers, Spinners & Dyers Open Day 2015

Birmingham Guild of Weavers, Spinners & Dyers Open Day 2015

Birmingham Guild of Weavers, Spinners & Dyers Open Day 2015

Birmingham Guild of Weavers, Spinners & Dyers Open Day 2015

As at all Guild meetings, there was plenty of homemade cake and tea available.

Birmingham Guild of Weavers, Spinners & Dyers Open Day 2015

And, temptingly, there was a sale table where you could buy items made by Guild members, including dyed roving and yarn, knit and woven accessories, clay buttons and yarn bowls, and wooden looms. I was manning the stall in the afternoon which was pretty dangerous for my wallet, but was relatively restrained. I came home with some dyed DK yarn, and selected some lovely clay buttons and a yarn bowl which my Mom bought for my upcoming birthday.

Birmingham Guild of Weavers, Spinners & Dyers Open Day 2015

Birmingham Guild of Weavers, Spinners & Dyers Open Day 2015

Birmingham Guild of Weavers, Spinners & Dyers Open Day 2015

Birmingham Guild of Weavers, Spinners & Dyers Open Day 2015

Birmingham Guild of Weavers, Spinners & Dyers Open Day 2015

Birmingham Guild of Weavers, Spinners & Dyers Open Day 2015

Birmingham Guild of Weavers, Spinners & Dyers Open Day 2015

Birmingham Guild of Weavers, Spinners & Dyers Open Day 2015

If you live locally, the Birmingham Guild 2016 programme has been announced and is looking good, with upcoming spinning and weaving workshops, plus there are guilds across the UK.


8 Comments

Indigo Dyeing

Natural Dyeing with Indigo

I recently got the chance to spend a Saturday in my garden dyeing with indigo. A mixture of fibres went into my indigo dye vat, including:

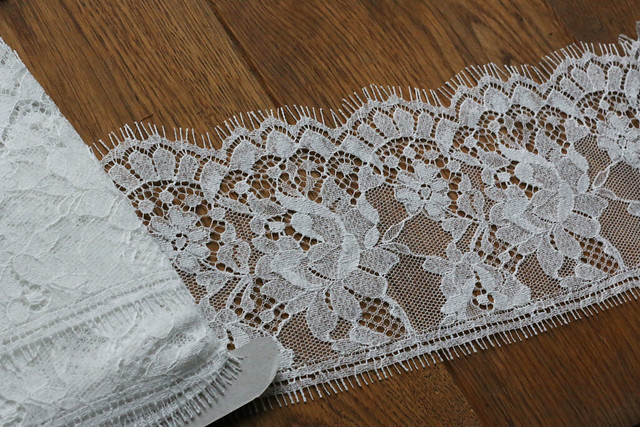
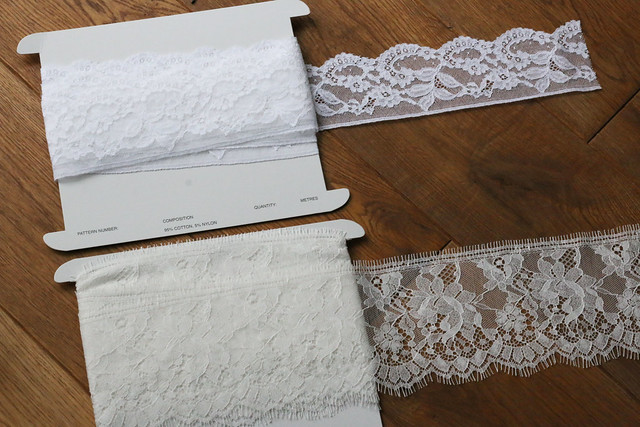
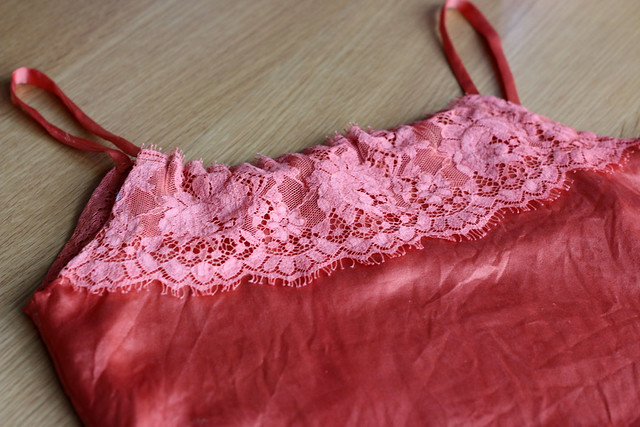
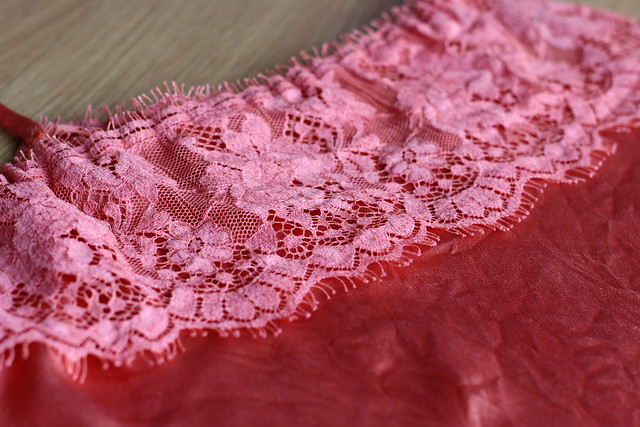
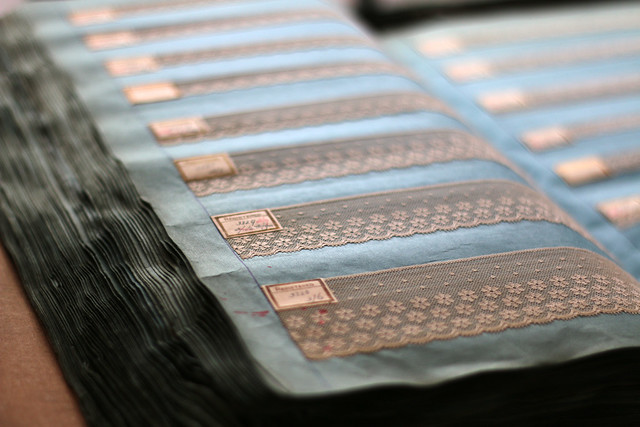
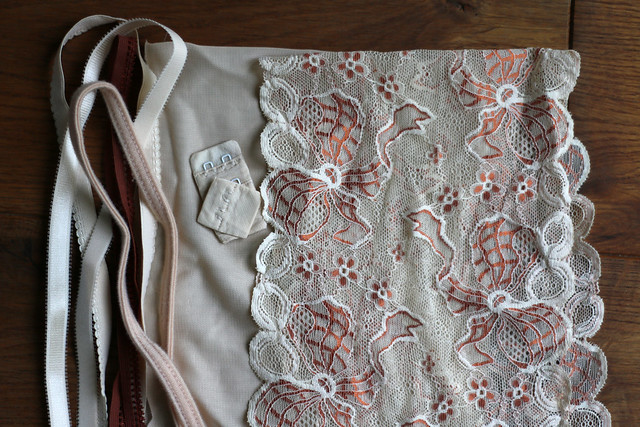
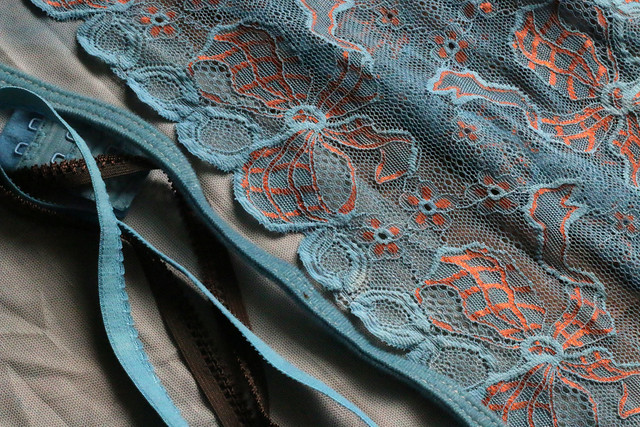
A lingerie kit purchased from Merckwaerdigh. I purchased it with the intention of dyeing it, so selected a nude and copper kit, which was the lightest coloured kit in the shop at the time.

Natural Dyeing with Indigo

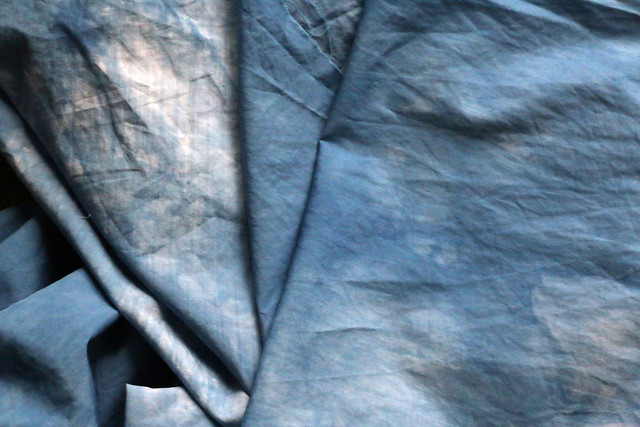
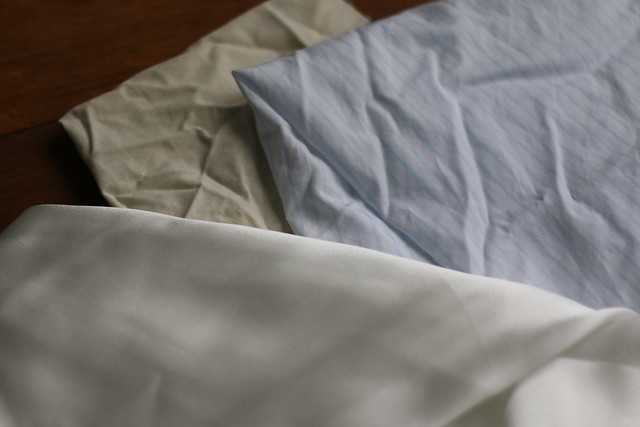
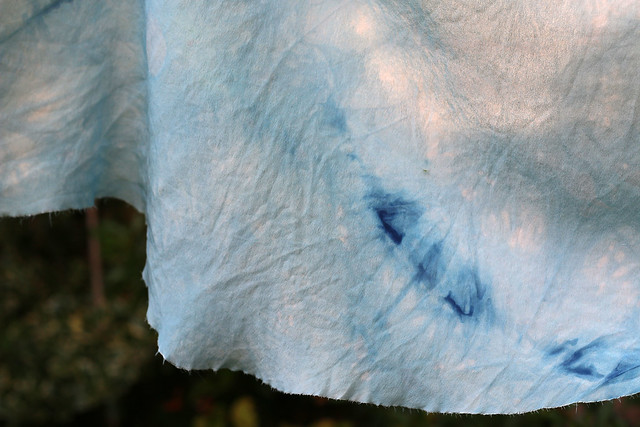
Three pieces of fabric. A small square of Ikea unbleached cotton (back), Paul Smith cotton shirting purchased during the Sewing for Pleasure show at the NEC back in March (right), and organic silk from Majestic Textiles (left).

Natural Dyeing with Indigo

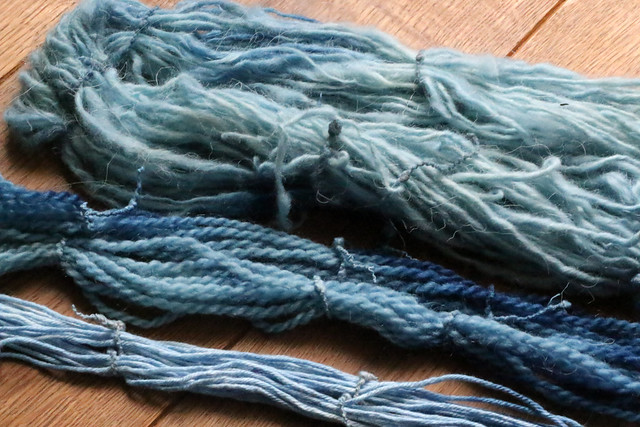
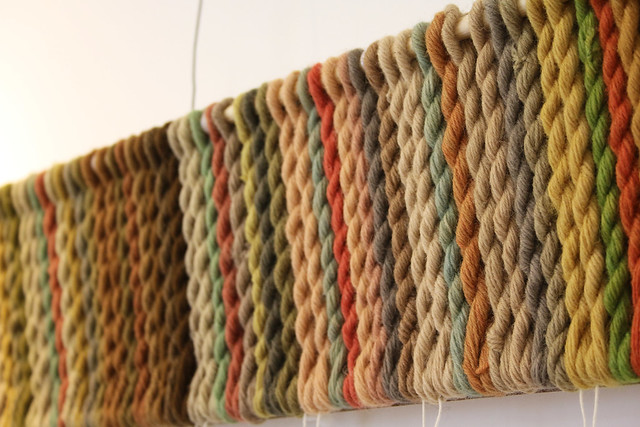
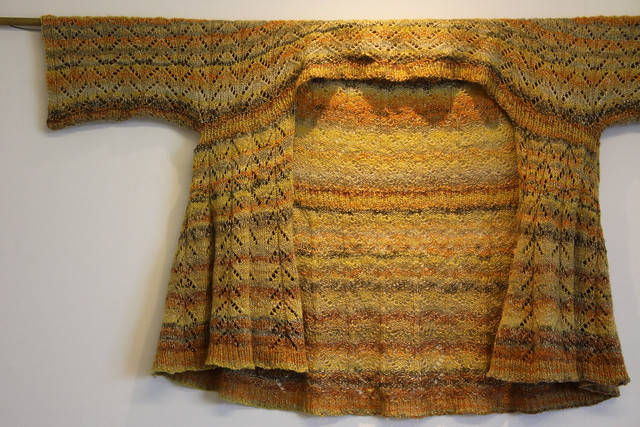
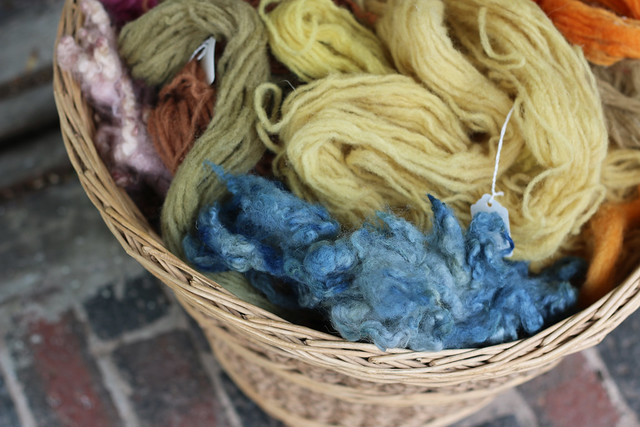
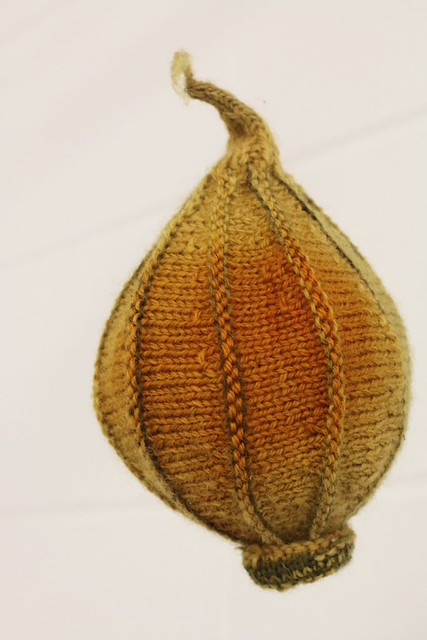
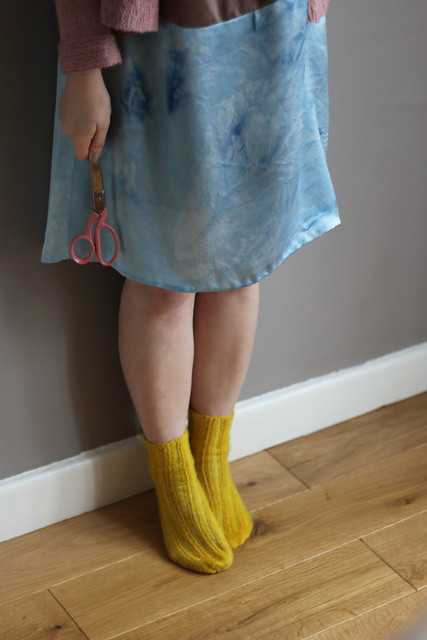
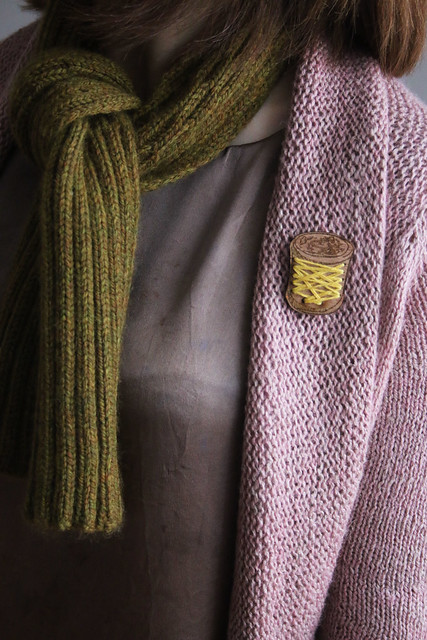
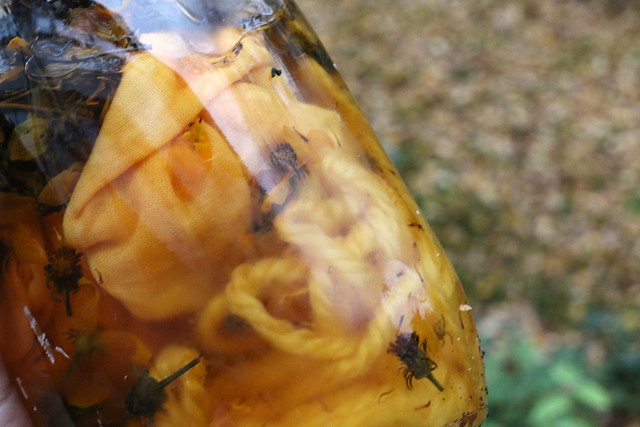
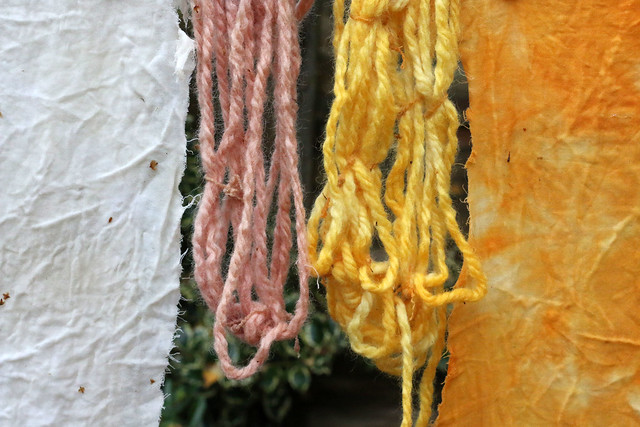
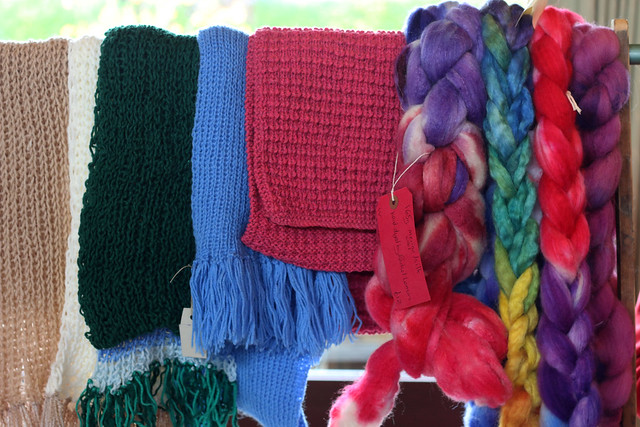
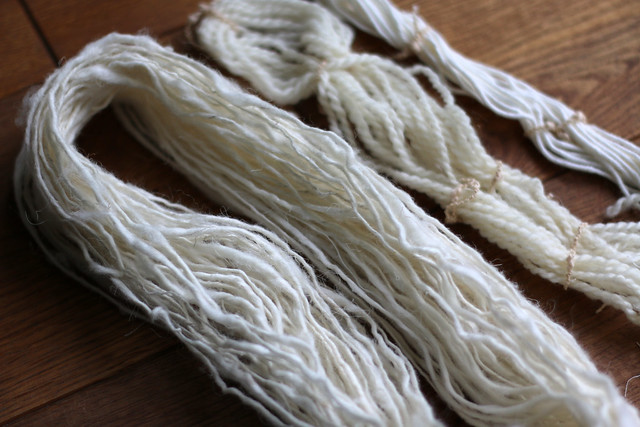
I also added a small amount of yarn to the pot, including my first attempt at hand spun yarn (left), 100% wool aran (centre), and cotton yarn (right). Indigo is a substantive dye, meaning that fibres don’t need to be mordanted in advance of dyeing (woo hoo!) so all I did to prepare these fabics and yarns was wash them as I normally would (i.e. cottons in the washing machine, silk and yarn by hand), and then leave them soaking in clean water before adding them to the dye pot.

Natural Dyeing with Indigo

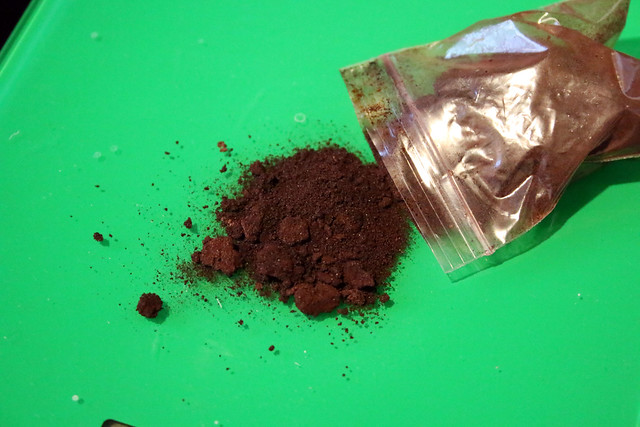
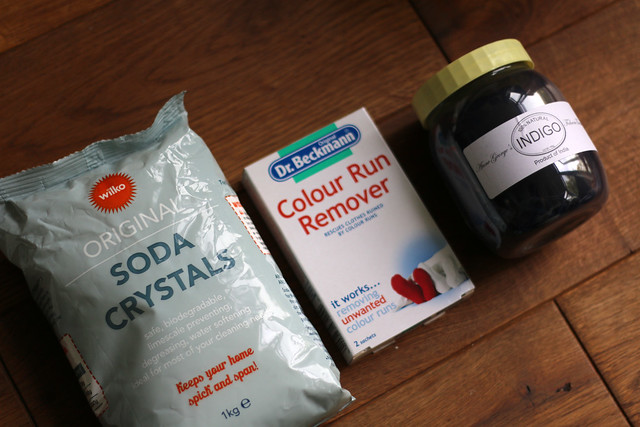
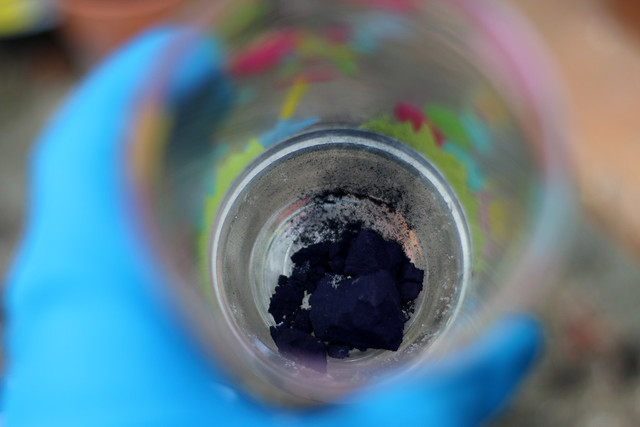
I purchased the natural indigo I used from Fabric Treasury. I bought it in ‘cake’ form, so it arrived as a solid block inside the tub. In order to dye with indigo (create an indigo vat), oxygen needs to be removed from the vat before fibres are added using a reducing agent. There are multiple alternative methods of preparing an indigo vat, but I chose to use the method described by Linda Rudkin in Natural Dyes which uses washing soda and a reducing agent such as colour run remover. I purchased both the washing soda and colour run removed from Wilko.

Natural Dyeing with Indigo

Here is the indigo I chipped off the cake for the dye pot. Only 10g (two teaspoons) is required for up to 400g of fibres, so it goes a long way. I am actually being good and wearing (blue) rubber gloves in the photo below, although I have a bad habit of taking them off. I did end up with blue fingers by the end of the day.

Natural Dyeing with Indigo

Natural indigo has a strong smell, so I’d recommend dyeing outside if possible. I purchased a cheap one-plate hob to allow me to do this. I was careful to keep an eye on it the whole time it was turned on, in case any curious neighbourhood cats got too close.

Natural Dyeing with Indigo

To dye 400 grams of fibre the process is:

♥ Thoroughly dissolve 50g washing soda in 250ml of boiling water (this should be in a separate bowl, not your main pan).

♥ Mix 10g (two teaspoons) of indigo with 30ml of warm water to create a paste, and then add to the washing soda solution, stirring until dissolved.

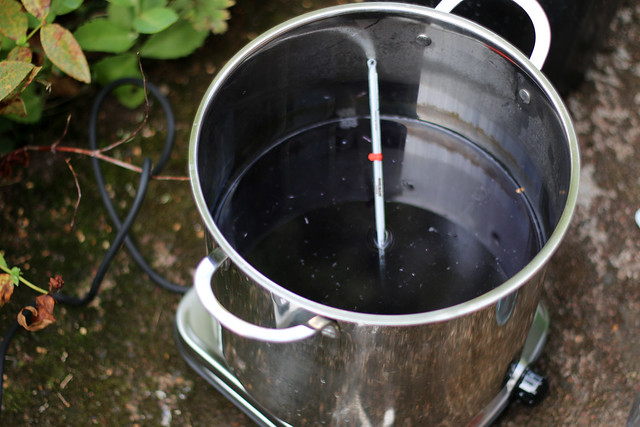
♥ Fill your dye pan with 4 litres of water and heat to 50ºC (it is important the temperature does not exceed 60ºC), then gently add the indigo solution and carefully stir in.

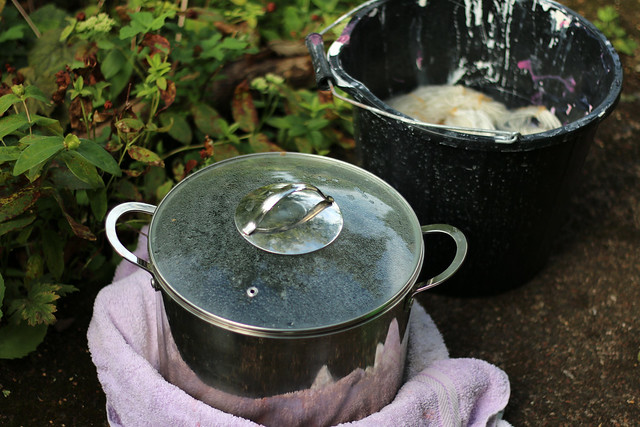
♥ I removed my pan from the heat at this point, wrapping it in a towel. Then I sprinkled 25g (or one packet) of colour run remover over the surface of the pan, covered it and left it to stand for 60 minutes.

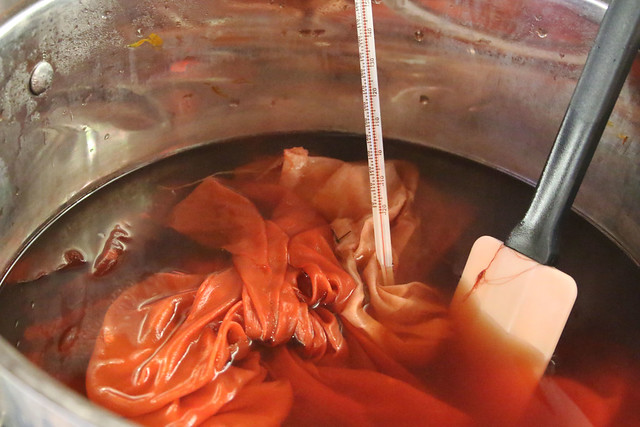
♥ After 60 minutes, I added my pre-wetted fibres to the pan. To avoid introducing oxygen into the pan, I first squeezed the fibres to remove excess water and lowered them in slowly. Fibres should be fully immersed below the surface, so I weighted those that refused to stay down!

♥ After a few minutes I removed my fibres from the pan with a slotted spoon. When removing fibres you want to avoid drips as much as possible to avoid adding oxygen.

Natural Dyeing with Indigo

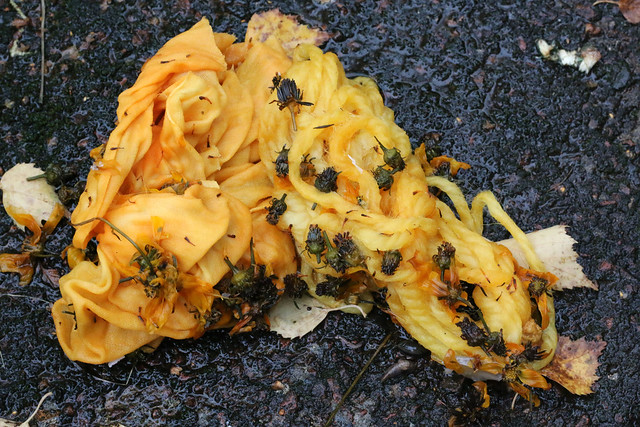
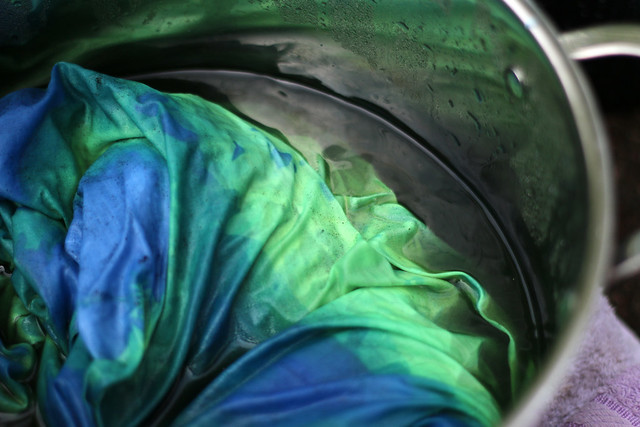
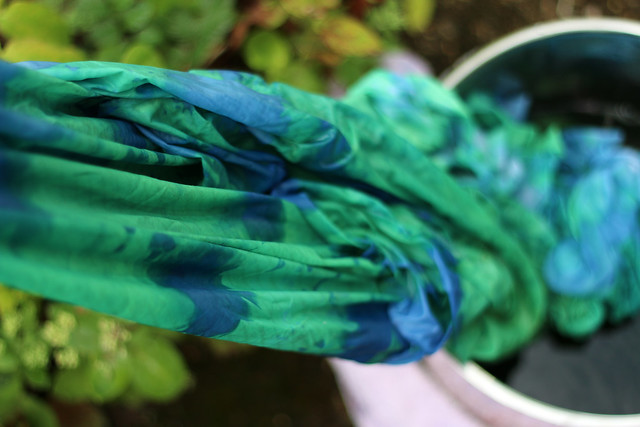
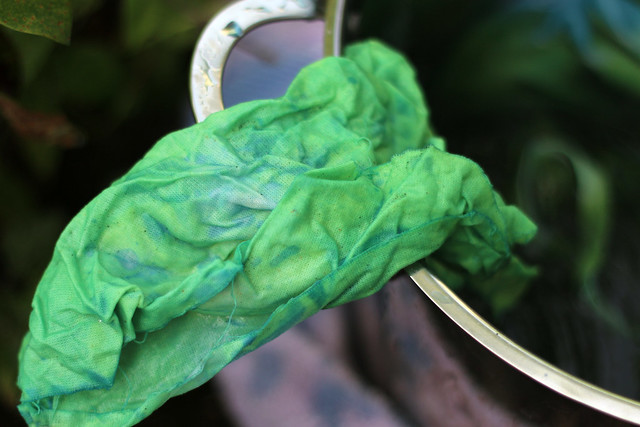
While in the pan the fibres appear green, and turn blue as they are removed and exposed to oxygen. Fibres can be returned to the pan if you aren’t happy with the initial colour achieved.

Natural Dyeing with Indigo

Natural Dyeing with Indigo

Natural Dyeing with Indigo

Natural Dyeing with Indigo

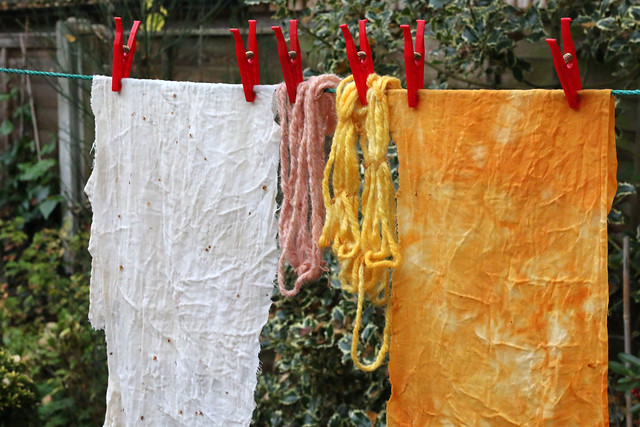
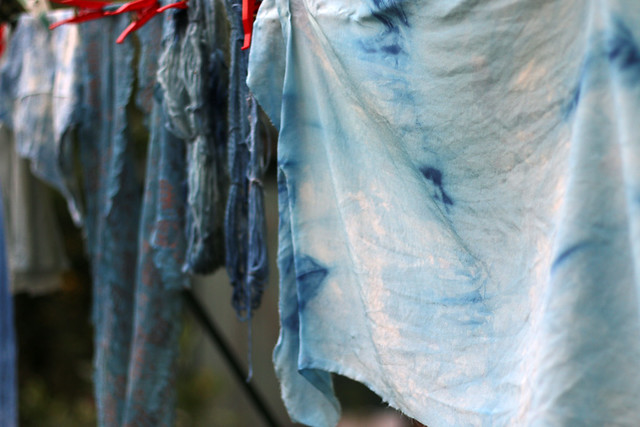
Once removed from the pan, I rinsed the fibres and hung them on the line to dry, before giving them a full wash (in the machine for the cottons, and by hand for the silk and yarn).

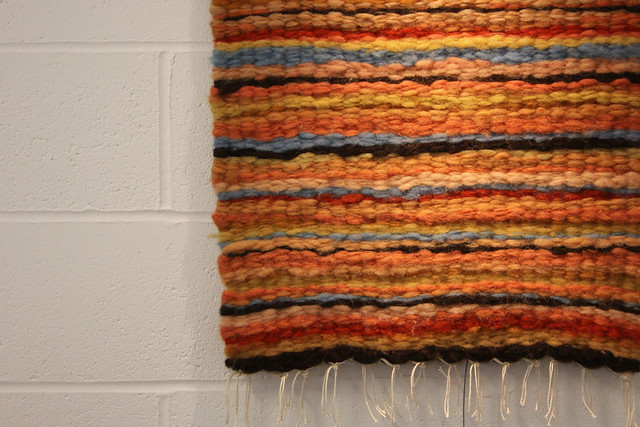
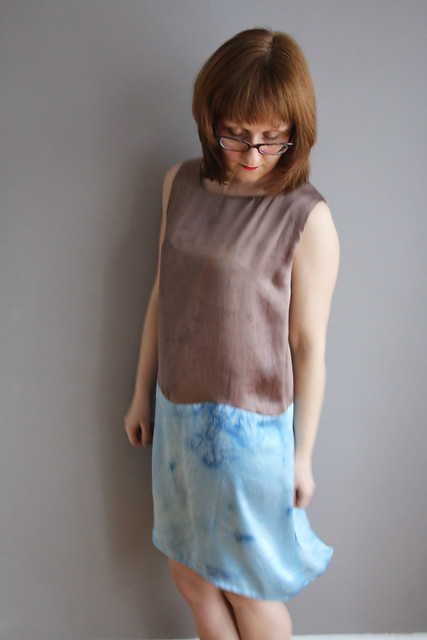
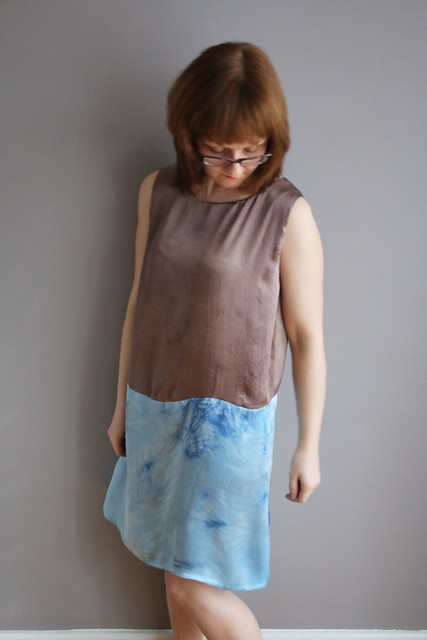
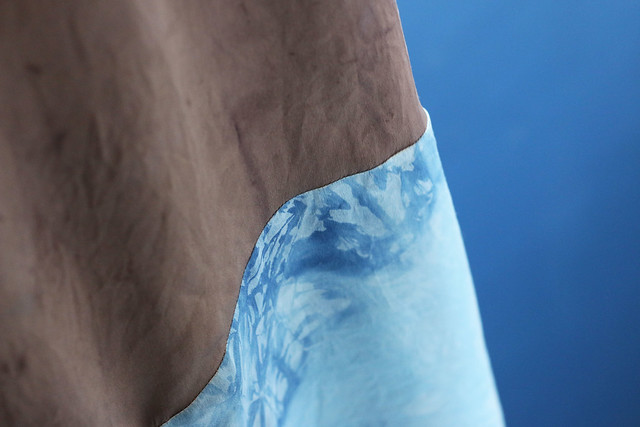
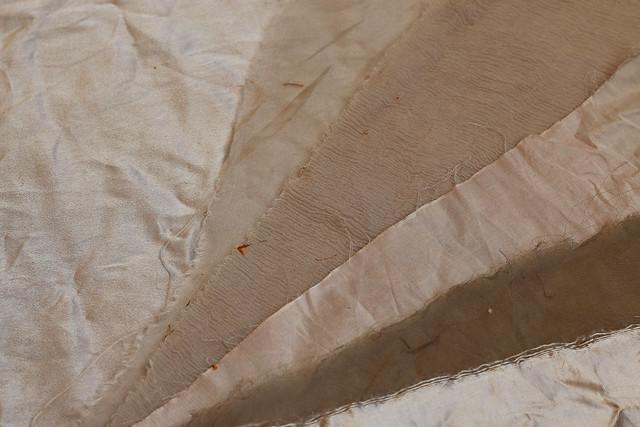
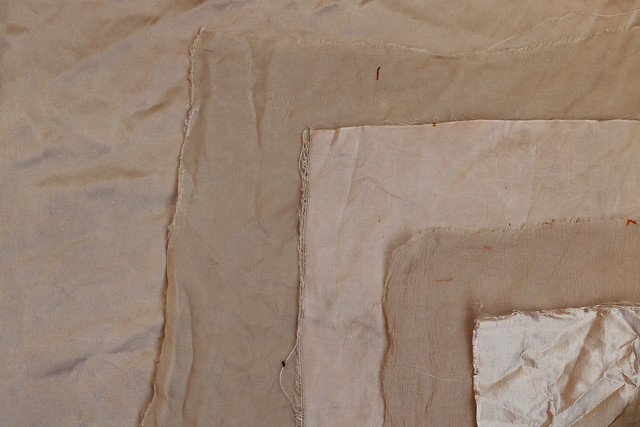
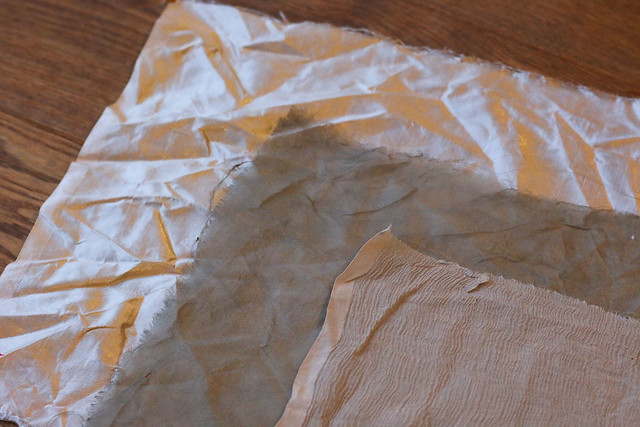
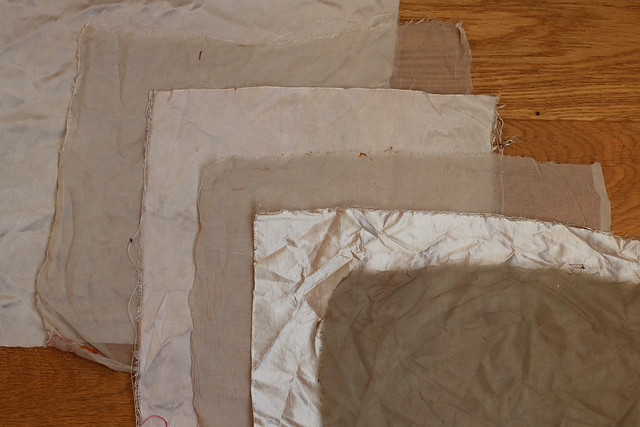
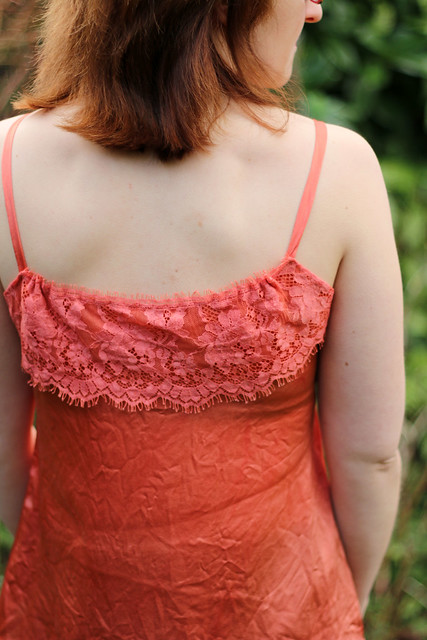
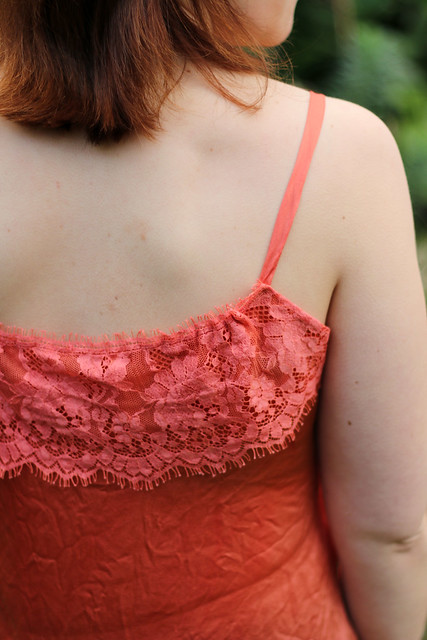
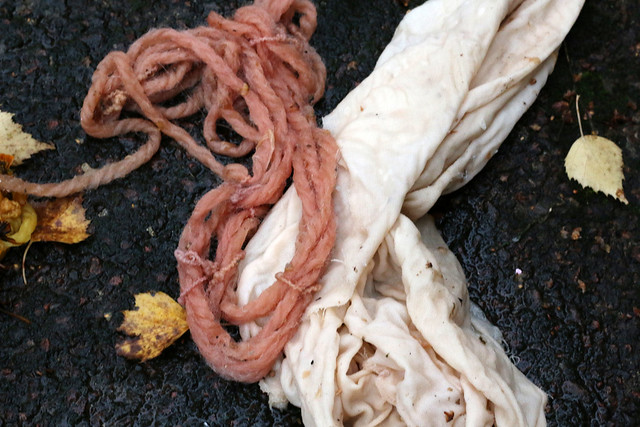
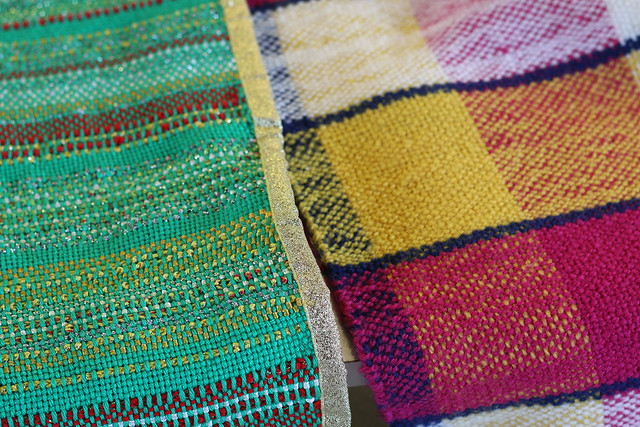
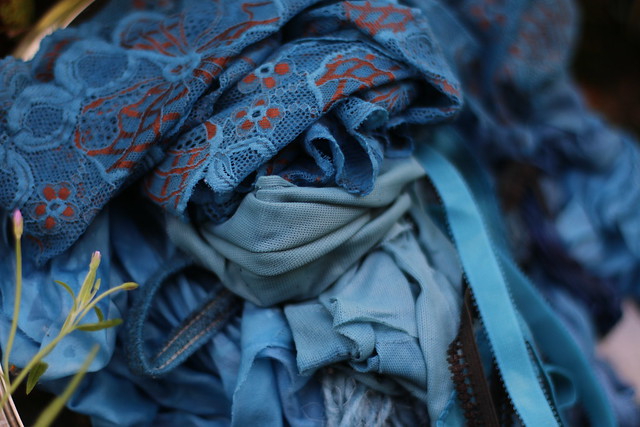
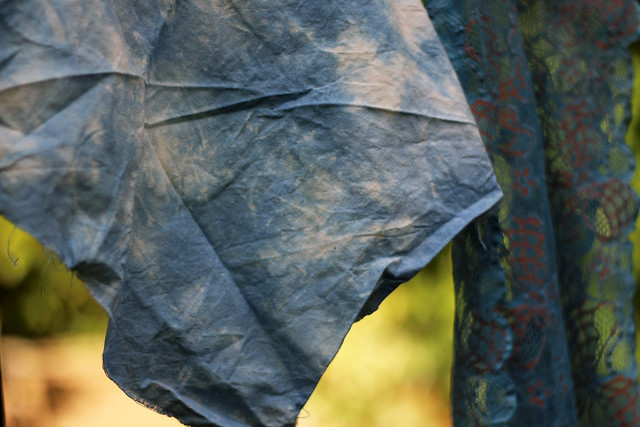
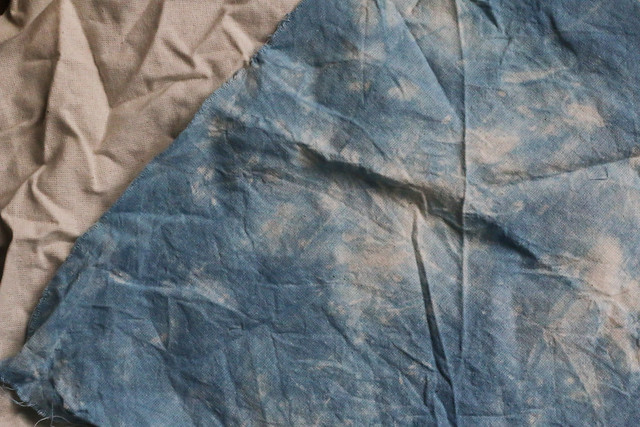
As you can see in the pictures below, I achieved a mottled effect on my fabrics as a result of adding them to the pan scrunched up, and placing large amounts of fibre in the pan. I like the mottled effect, but a more consistent colour could be achieved by ensuring that all areas of the fabric are exposed to the dye, or returning the fabrics to the pan multiple times.

Natural Dyeing with Indigo

Natural Dyeing with Indigo

Natural Dyeing with Indigo

Natural Dyeing with Indigo

Natural Dyeing with Indigo

Natural Dyeing with Indigo

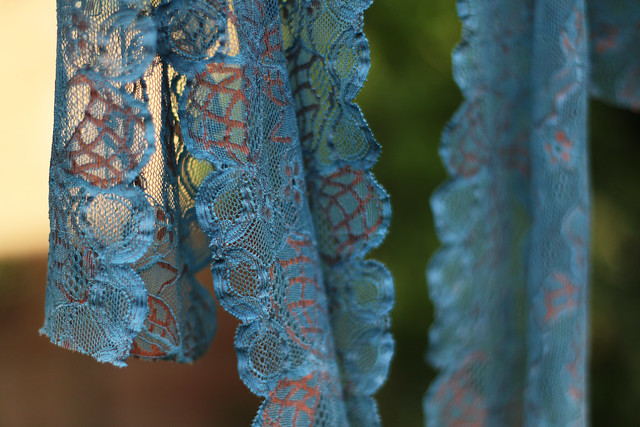
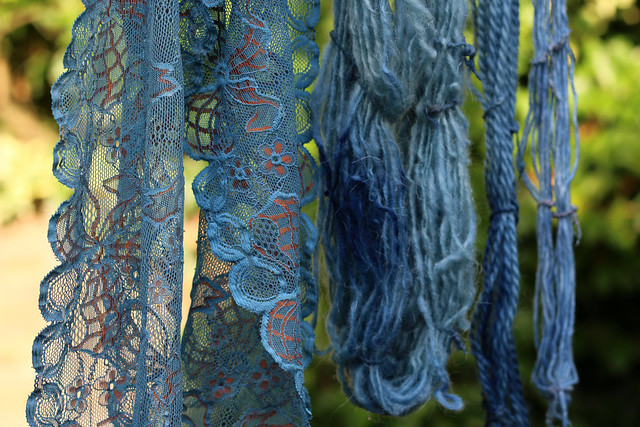
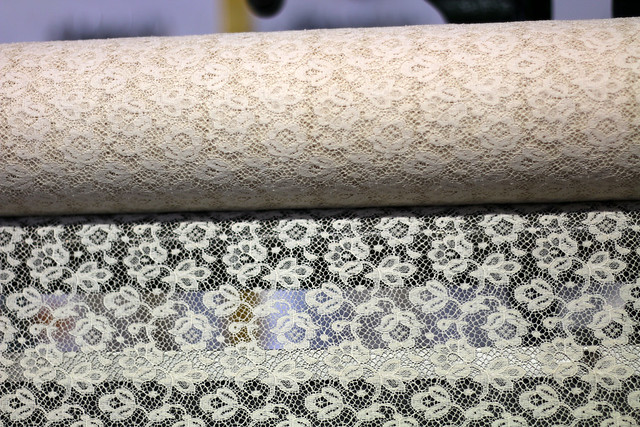
I really love the finished colour of the lace, the nude sections dyed beautifully. The copper sections didn’t take the colour at all, but I think they look great with the blue.

Natural Dyeing with Indigo

Unbleached cotton, before and after.

Natural Dyeing with Indigo

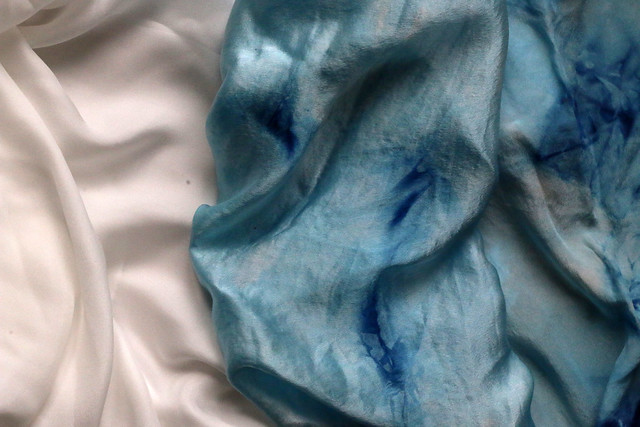
Organic silk, before and after.

Natural Dyeing with Indigo

If you’re thinking about trying natural dyeing I’d recommend a substantive dye such as indigo, since removing the need to mordant fibres makes the dyeing process much quicker. Also, the additional ingredients required (washing soda and colour run remover) are easy and cheap to obtain.Natural Dyeing with Indigo

Natural Dyeing with Indigo